GE PYE22KSKSS Use and Care Manual - Page 43
Auto Fill, Autofill - freezer not working
 |
View all GE PYE22KSKSS manuals
Add to My Manuals
Save this manual to your list of manuals |
Page 43 highlights
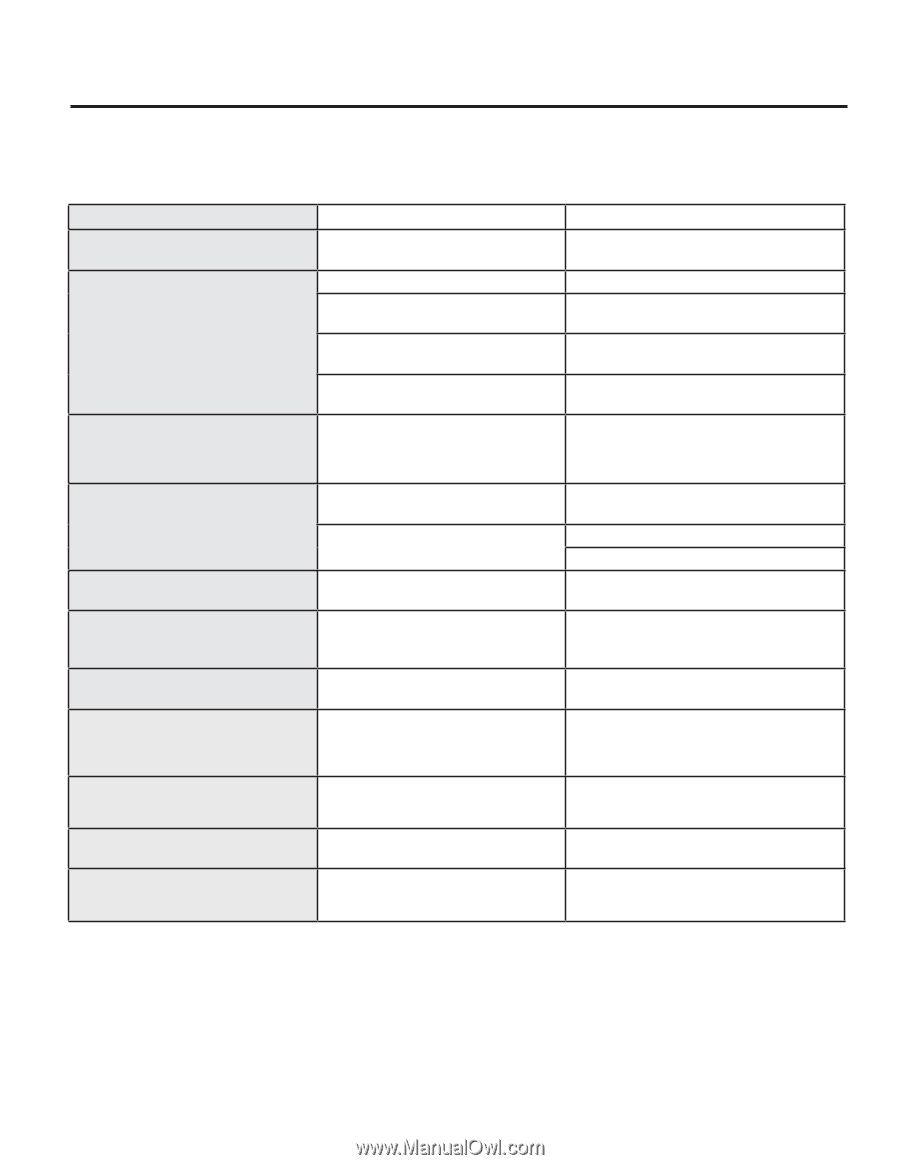
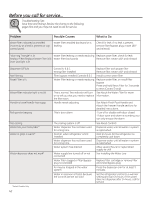
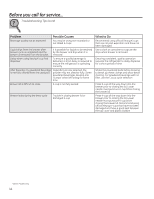
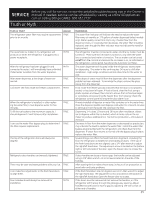
GEAppliances.com Problem Water spurting from dispenser* No water or ice cube production* Water is leaking from dispenser* Possible Causes Newly installed filter cartridge Supply line or shutoff valve is clogged Water filter is clogged Filter cartridge not properly installed Ice maker is turned off Air may be present in the water line system, causing water to drip after being dispensed What to Do Run water from the dispenser for 5 minutes (about 2 gallons) Call a plumber Replace filter cartridge or remove filter and install bypass plug Remove and reinstall filter cartridge, being certain that it locks in place. Check that the ice maker is turned on. See About the Automatic Ice Maker. Dispense water for at least 5 minutes to remove air from system AUTO FILL under fill/no fill* Not all containers work with AUTOFILL Error message AUTO FILL overfills* Not all containers work with AUTO FILL Freezer cooling, fresh food not cooling Normal, when refrigerator first plugged in or after extended power outage Ice dispenser opens after closing freezer drawer * Normal Low brewing flow rate There may have been a dent at the bottom of K-Cup causing the pin to pierce the filter allowing coffee grounds clogging the bottom pin Low brewing flow rate / water drips Top needle of the brewer clogged from inner door Brewer is not detected or hot water leaking from top of the brewer Coffee dispensed with splash or bubble bursting Incorrect assembly of brewer in the bracket Blocked vent hole in the brewer Try different container See page. 12 Clean sensor. See page. 12. Try different container Wait 24 hours for temperature in both compartments to reach selected temperatures. The ice dispenser door may open after closing freezer door to allow access Avoid using damaged/dented K-cups, and clean the lower needle before next brew Unclog the top needle holes using a paper clip and rinse brewer. Rinse brewer after every use. Make sure the Keurig Logo is in the front. Push brewer all the way in the brackets Make sure the vent hole at the bottom of the brewer is clear from food or any other contamination *Select Models Only 43
-
 1
1 -
2
-
3
-
4
-
5
-
6
-
7
-
8
-
9
-
10
-
11
-
12
-
13
-
14
-
15
-
16
-
17
-
18
-
19
-
20
-
21
-
22
-
23
-
24
-
25
-
26
-
27
-
28
-
29
-
30
-
31
-
32
-
33
-
34
-
35
-
36
-
37
-
 38
38 -
 39
39 -
 40
40 -
 41
41 -
 42
42 -
 43
43 -
 44
44 -
 45
45 -
 46
46 -
 47
47 -
 48
48 -
49
-
50
-
51
-
52
-
53
-
54
-
55
-
56
-
57
-
58
-
59
-
60
-
61
-
62
-
63
-
64
-
65
-
66
-
67
-
68
-
69
-
70
-
71
-
72
-
73
-
74
-
75
-
76
-
77
-
78
-
79
-
80
-
81
-
82
-
83
-
84
-
85
-
86
-
87
-
88
-
89
-
90
-
91
-
92
-
93
-
94
-
95
-
96
-
97
-
98
-
99
-
100
-
101
-
102
-
103
-
104
-
105
-
106
-
107
-
108
-
109
-
110
-
111
-
112
-
113
-
114
-
115
-
116
-
117
-
118
-
119
-
120
-
121
-
122
-
123
-
124
-
125
-
126
-
127
-
128
-
129
-
130
-
131
-
132
-
133
-
134
-
135
-
136
-
137
-
138
-
139
-
140
-
141
-
142
-
143
-
144
-
145
-
146
-
147
-
148
-
149
-
150
-
151
-
152
 |
 |