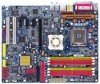
Gigabyte GA-8AENXP-D Manual - Page 78
/ 6- / 8- Channel Audio Function Introduction - audio driver
 |
View all Gigabyte GA-8AENXP-D manuals
Add to My Manuals
Save this manual to your list of manuals |
Page 78 highlights
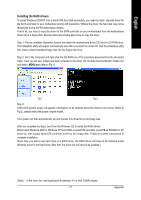
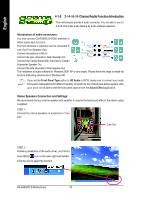
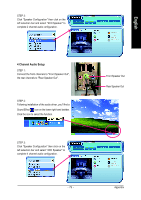
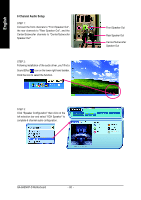
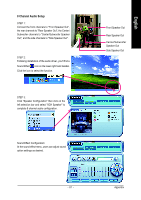
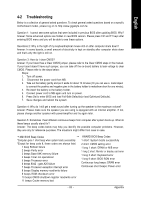
English 4-1-5 2- / 4- / 6- / 8- ChannelAudio Function Introduction This motherboard provide 6 audio connector. You are able to use 2-/ 4-/6-/8-channnels audio feature by audio software selection. Introduction of audio connectors: You may connect CD-ROM/DVD-ROM, walkman or others audio input to Line In. The front channels or earphone can be connected to Line Out (Front Speaker Out). Connect microphone to Mic In. Connect the rear channels to Rear Speaker Out. Connect the Center/Subwoofer channels to Center/ Line In Line Out (Front Speaker Out) Mic In Rear Speaker Out Center/Subwoofer Speaker Out Side Speaker Out Subwoofer Speaker Out. Connect the side channels to Side Speaker Out. The installation of audio software for Windows 2000/ XP is very simple. Please follow the steps to install the function.(Following pictures are in Windows XP) If you set the Front Panel Type option to HD Audio in BIOS, make sure to connect your audio front panel cable(optional for different models) connector to the motherboard before system startup or you'll not be able to see the front panel options from the Sound Effect application. Stereo Speakers Connection and Settings: We recommend that you use the speaker with amplifier to acquire the best sound effect if the stereo output is applied. STEP 1: Connect the stereo speakers or earphone to "Line Out". Line Out STEP 2 : Following installation of the audio driver, you'll find a Sound Effect icon on the lower right hand taskbar. Click the icon to select the function. GA-8AENXP-D Motherboard - 78 -
-
 1
1 -
2
-
3
-
4
-
5
-
6
-
7
-
8
-
9
-
10
-
11
-
12
-
13
-
14
-
15
-
16
-
17
-
18
-
19
-
20
-
21
-
22
-
23
-
24
-
25
-
26
-
27
-
28
-
29
-
30
-
31
-
32
-
33
-
34
-
35
-
36
-
37
-
38
-
39
-
40
-
41
-
42
-
43
-
44
-
45
-
46
-
47
-
48
-
49
-
50
-
51
-
52
-
53
-
54
-
55
-
56
-
57
-
58
-
59
-
60
-
61
-
62
-
63
-
64
-
65
-
66
-
67
-
68
-
69
-
70
-
71
-
72
-
 73
73 -
 74
74 -
 75
75 -
 76
76 -
 77
77 -
 78
78 -
 79
79 -
 80
80 -
 81
81 -
 82
82 -
 83
83 -
84
-
85
-
86
-
87
-
88
 |
 |