Gigabyte GA-A320-DS3 User Manual - Page 26
Network Stack, Ipv4 PXE Support, Administrator Password, User Password
 |
View all Gigabyte GA-A320-DS3 manuals
Add to My Manuals
Save this manual to your list of manuals |
Page 26 highlights
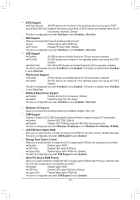
&& Network Stack Disables or enables booting from the network to install a GPT format OS, such as installing the OS from the Windows Deployment Services server. (Default: Disabled) && Ipv4 PXE Support Enables or disables IPv4 PXE Support. This item is configurable only when Network Stack is enabled. && Ipv4 HTTP Support Enables or disables HTTP boot support for IPv4. This item is configurable only when Network Stack is enabled. && Ipv6 PXE Support Enables or disables IPv6 PXE Support. This item is configurable only when Network Stack is enabled. && Ipv6 HTTP Support Enables or disables HTTP boot support for IPv6. This item is configurable only when Network Stack is enabled. && Administrator Password Allows you to configure an administrator password. Press on this item, type the password, and then press . You will be requested to confirm the password. Type the password again and press . You must enter the administrator password (or user password) at system startup and when entering BIOS Setup. Differing from the user password, the administrator password allows you to make changes to all BIOS settings. && User Password Allows you to configure a user password. Press on this item, type the password, and then press . You will be requested to confirm the password. Type the password again and press . You must enter the administrator password (or user password) at system startup and when entering BIOS Setup. However, the user password only allows you to make changes to certain BIOS settings but not all. To cancel the password, press on the password item and when requested for the password, enter the correct one first. When prompted for a new password, press without entering any password. Press again when prompted to confirm. NOTE: Before setting the User Password, be sure to set the Administrator Password first. - 26 -
-
 1
1 -
2
-
3
-
4
-
5
-
6
-
7
-
8
-
9
-
10
-
11
-
12
-
13
-
14
-
15
-
16
-
17
-
18
-
19
-
20
-
 21
21 -
 22
22 -
 23
23 -
 24
24 -
 25
25 -
 26
26 -
 27
27 -
 28
28 -
 29
29 -
 30
30 -
 31
31 -
32
-
33
-
34
-
35
-
36
-
37
-
38
-
39
 |
 |