Gigabyte GA-H61MA-D3V Manual - Page 38
Appendix
 |
View all Gigabyte GA-H61MA-D3V manuals
Add to My Manuals
Save this manual to your list of manuals |
Page 38 highlights
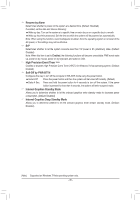
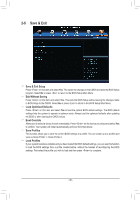
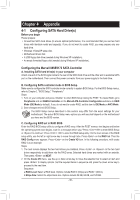
Chapter 4 Appendix 4-1 Configuring SATA Hard Drive(s) Before you begin Please prepare: •• At least two SATA hard drives (to ensure optimal performance, it is recommended that you use two hard drives with identical model and capacity). If you do not want to create RAID, you may prepare only one hard drive. •• Windows 7/Vista/XP setup disk. •• Motherboard driver disk. •• A USB floppy disk drive (needed during Windows XP installation). •• An empty formatted floppy disk (needed during Windows XP installation). Configuring the Marvell 88SE9172 SATA Controller A. Installing SATA hard drive(s) in your computer Attach one end of the SATA signal cable to the rear of the SATA hard drive and the other end to available SATA port on the motherboard. Then connect the power connector from your power supply to the hard drive. B. Configuring SATA controller mode in BIOS Setup Make sure to configure the SATA controller mode correctly in system BIOS Setup. For the BIOS Setup menus, refer to Chapter 2, "BIOS Setup," "Peripherals." Steps: 1. Turn on your computer and press to enter BIOS Setup during the POST. To create RAID, go to Peripherals and set GSATA Controller on the Marvell ATA Controller Configuration submenu to RAID Mode (IDE Mode by default). If you do not want to create RAID, set this item to IDE Mode or AHCI Mode. 2. Save changes and exit BIOS Setup. The BIOS Setup menus described in this section may differ from the exact settings for your motherboard. The actual BIOS Setup menu options you will see shall depend on the motherboard you have and the BIOS version. C. Configuring RAID set in RAID BIOS Enter the RAID BIOS setup utility to configure a RAID array. After the POST memory test begins and before the operating system boot begins, look for a message which says "Press + to enter BIOS Setup or to continue". Press + to enter the RAID setup utility. On the main screen of the RAID setup utility, use the left or right arrow key to move through tabs. Press on the RAID tab. Then the RAID Config menu appears. Press on the Create VD item. In the following procedure, we'll create RAID 0 as an example. Steps: 1. The next screen displays the two hard drives you installed. Press or on the two hard drives respectively to add them into the RAID array. Selected hard drives are marked with an asterisk. Then press on NEXT. 2. On the Create VD menu, use the up or down arrow key to move the selection bar to select an item and press to display options. Set the required items in sequence and press the down arrow key to proceed to the next item. Sequence: a.RAID Level: Select a RAID level. Options include RAID 0 (Stripe) and RAID 1 (Mirror). b.Stripe Size: Select the stripe block size. Options include 32 KB, 64 KB, and 128 KB. - 38 -
-
 1
1 -
2
-
3
-
4
-
5
-
6
-
7
-
8
-
9
-
10
-
11
-
12
-
13
-
14
-
15
-
16
-
17
-
18
-
19
-
20
-
21
-
22
-
23
-
24
-
25
-
26
-
27
-
28
-
29
-
30
-
31
-
32
-
 33
33 -
 34
34 -
 35
35 -
 36
36 -
 37
37 -
 38
38 -
 39
39 -
 40
40 -
 41
41 -
 42
42 -
 43
43 -
44
 |
 |