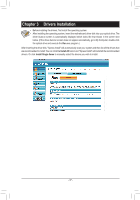
Gigabyte GA-H61MA-D3V Manual - Page 39
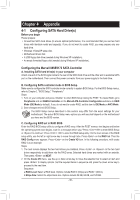
Making a SATA RAID/AHCI Driver Diskette, Installing the SATA RAID/AHCI Driver and Operating System
 |
View all Gigabyte GA-H61MA-D3V manuals
Add to My Manuals
Save this manual to your list of manuals |
Page 39 highlights
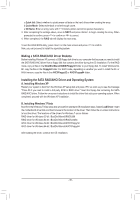
c.Quick Init: Select whether to quickly erase old data on the hard drives when creating the array. d.Cache Mode: Select write-back or write-through cache. e.VD Name: Enter an array name with 1~10 letters (letters cannot be special characters). 3. After completing the settings above, move to NEXT and press to begin creating the array. When prompted to confirm, press to confirm or to cancel. 4. When completed, the RAID tab will display the new array. To exit the RAID BIOS utility, press on the main screen and press to confirm. Now, you can proceed to install the operating system. Making a SATA RAID/AHCI Driver Diskette Before installing Windows XP, connect a USB floppy disk drive to your computer first because you need to install the SATA RAID/AHCI driver from a floppy disk that contains the driver during the OS installation. For the RAID mode, copy all files in the \BootDrv\Marvell\RAID\Floppy32 folder to your floppy disk. To install Windows 64Bit, copy the files in the Floppy64 folder. For AHCI mode, depending on whether you want to install the 32- or 64-bit version, copy the files in the AHCI\Floppy32 or AHCI\Floppy64 folder. Installing the SATA RAID/AHCI Driver and Operating System A. Installing Windows XP Restart your system to boot from the Windows XP setup disk and press as soon as you see the message "Press F6 if you need to install a 3rd party SCSI or RAID driver." Insert the floppy disk containing the SATA RAID/AHCI driver. Follow the on-screen instructions to install the driver that suits your operating system. When completed, proceed with the Windows XP installation. B. Installing Windows 7/Vista Boot from the Windows 7/Vista setup disk and perform standard OS installation steps. Select Load Driver. Insert the motherboard driver disk and then browse to the location of the driver. Then follow the on-screen instructions to load the driver. The locations of the drivers for Windows 7 are as follows: RAID driver for Windows 32-bit: \BootDrv\Marvell\RAID\i386 RAID driver for Windows 64-bit: \BootDrv\Marvell\RAID\amd64 AHCI driver for Windows 32-bit: \BootDrv\Marvell\AHCI\Floppy32 AHCI driver for Windows 64-bit: \BootDrv\Marvell\AHCI\Floppy64 After loading the driver, continue the OS installation. - 39 -
-
 1
1 -
2
-
3
-
4
-
5
-
6
-
7
-
8
-
9
-
10
-
11
-
12
-
13
-
14
-
15
-
16
-
17
-
18
-
19
-
20
-
21
-
22
-
23
-
24
-
25
-
26
-
27
-
28
-
29
-
30
-
31
-
32
-
33
-
 34
34 -
 35
35 -
 36
36 -
 37
37 -
 38
38 -
 39
39 -
 40
40 -
 41
41 -
 42
42 -
 43
43 -
 44
44
 |
 |