Gigabyte GA-Z77-HD3 Manual - Page 70
Recovering your system with Smart Recovery 2 Windows 7 only, Recovering your system using
 |
View all Gigabyte GA-Z77-HD3 manuals
Add to My Manuals
Save this manual to your list of manuals |
Page 70 highlights
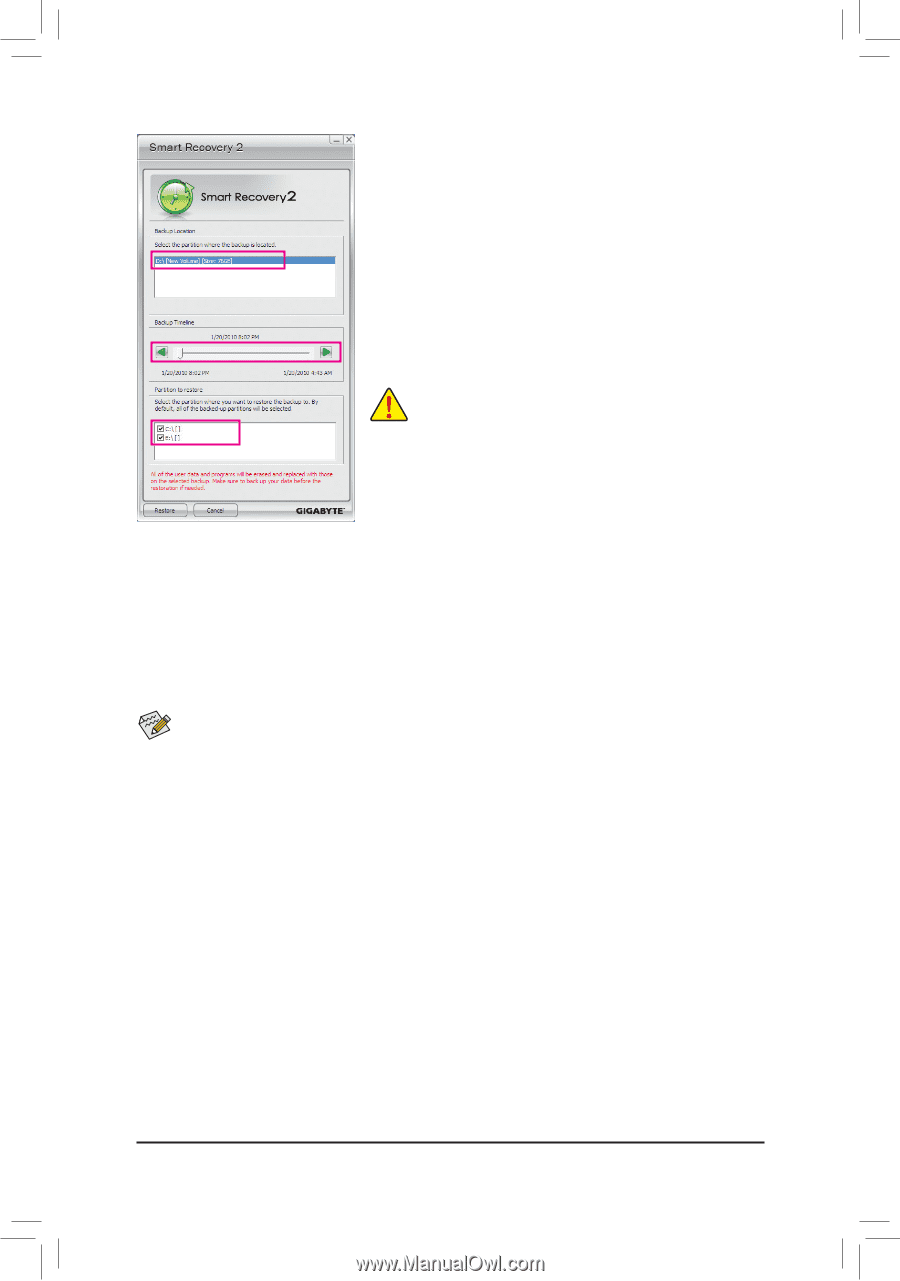
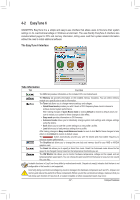
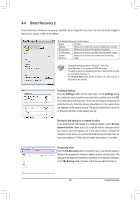
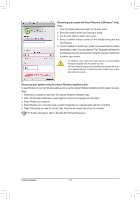
Recovering your system with Smart Recovery 2 (Windows 7 only): Steps: 1. Click the System Recovery button on the main menu. 2. Select the location where your backup is saved. 3. Use the time slider to select a time point. 4. Select a partition backup created on the selected time point and click Restore. 5. Confirm whether to restart your system to proceed with the restore immediately or later. Once you respond "Yes" the system will restart to the Windows recovery environment. Follow the onscreen instructions to restore your system. •• For Windows Vista, refer to the steps below to use the original Windows installation disk for system recovery. •• All of your files and programs will be deleted and replaced with those on the selected backup. If needed, be sure to make a copy of your data before the restore. Recovering your system using the original Windows installation disk: In case Windows or your hard drive has serious errors, use the original Windows installation disk for system recovery. Steps: 1. Restart your computer to boot from the original Windows installation disk. 2. When the Windows installation screen appears, select your language and click Next. 3. Select Repair your computer. 4. Select Restore your computer using a system image that you created earlier and then click Next. 5. Select the backup you want to use and then follow the on-screen instructions to complete. For further instructions, refer to the Help file of Smart Recovery 2. Unique Features - 70 -
-
 1
1 -
2
-
3
-
4
-
5
-
6
-
7
-
8
-
9
-
10
-
11
-
12
-
13
-
14
-
15
-
16
-
17
-
18
-
19
-
20
-
21
-
22
-
23
-
24
-
25
-
26
-
27
-
28
-
29
-
30
-
31
-
32
-
33
-
34
-
35
-
36
-
37
-
38
-
39
-
40
-
41
-
42
-
43
-
44
-
45
-
46
-
47
-
48
-
49
-
50
-
51
-
52
-
53
-
54
-
55
-
56
-
57
-
58
-
59
-
60
-
61
-
62
-
63
-
64
-
 65
65 -
 66
66 -
 67
67 -
 68
68 -
 69
69 -
 70
70 -
 71
71 -
 72
72 -
 73
73 -
 74
74 -
 75
75 -
76
-
77
-
78
-
79
-
80
-
81
-
82
-
83
-
84
-
85
-
86
-
87
-
88
-
89
-
90
-
91
-
92
-
93
-
94
-
95
-
96
-
97
-
98
-
99
-
100
-
101
-
102
-
103
-
104
 |
 |