Gigabyte GA-Z77-HD4 Manual - Page 74
Installing EZ Smart Response, A. System Requirements, B. Installation
 |
View all Gigabyte GA-Z77-HD4 manuals
Add to My Manuals
Save this manual to your list of manuals |
Page 74 highlights
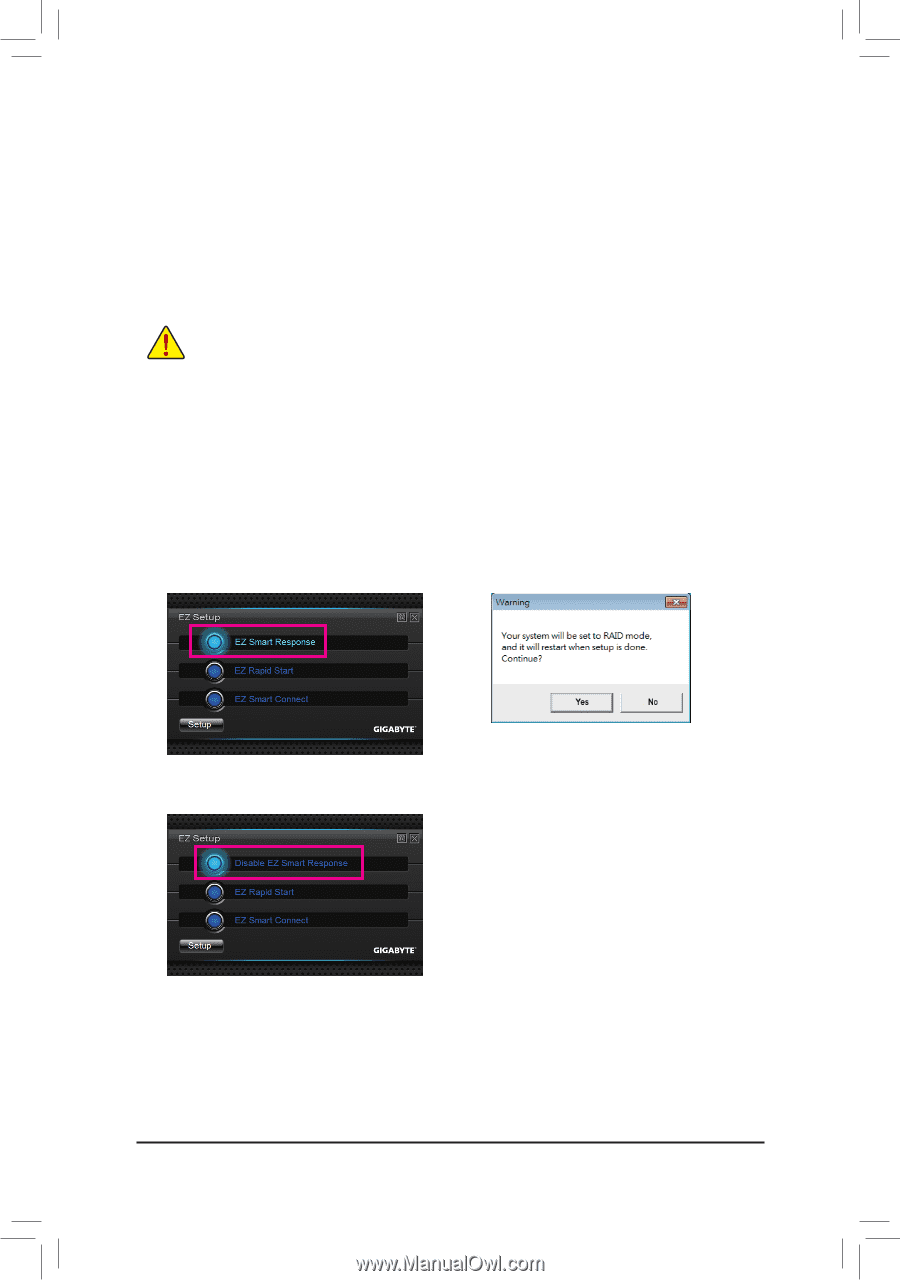
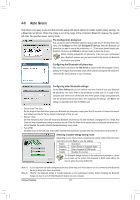
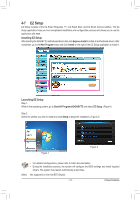
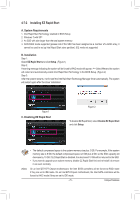
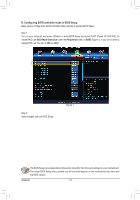
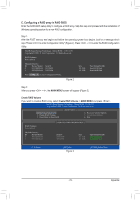
4-7-1 Installing EZ Smart Response A. System Requirements 1. An Intel Chipset-based motherboard supporting this feature (Note 1) 2. An Intel Core series processor 3. RAID enabled for the Intel SATA controllers in BIOS Setup 4. A conventional SATA disk and an SSD (Note 2) 5. Windows 7 with SP1 (Note 3) If you have installed the operating system before configuring the Smart Response Technology, all original data on the hard disk will be lost once you enable RAID mode. It is recommended that you back up the hard disk before enabling the Smart Response Technology. B. Installation Step 1: Select EZ Smart Response and click Setup. (Figure 1) Step 2: A warning message indicating that the system will be forced to RAID mode will appear. (Note 4) Select Yes and the system will restart. (Figure 2) Step 3: After the system restarts, it will install the Intel Raid Storage Technology driver automatically. The system will restart again after the driver installation. Figure 1 C. Disabling EZ Smart Response Figure 2 To disable EZ Smart Response, select Disable EZ Smart Response and click Setup. (Note 1) Not supported on the Intel B75 Chipset. (Note 2) The SSD works as a cache of the hard disk. The maximum cache memory size is 64 GB. If you use an SSD larger than 64 GB, the space beyond 64 GB can still be used for storing your data. (Note 3) The operating system must be installed to the SATA disk. (Note 4) Regardless of the BIOS settings, be it IDE or AHCI mode, the system will be forced to RAID mode. Unique Features - 74 -
-
 1
1 -
2
-
3
-
4
-
5
-
6
-
7
-
8
-
9
-
10
-
11
-
12
-
13
-
14
-
15
-
16
-
17
-
18
-
19
-
20
-
21
-
22
-
23
-
24
-
25
-
26
-
27
-
28
-
29
-
30
-
31
-
32
-
33
-
34
-
35
-
36
-
37
-
38
-
39
-
40
-
41
-
42
-
43
-
44
-
45
-
46
-
47
-
48
-
49
-
50
-
51
-
52
-
53
-
54
-
55
-
56
-
57
-
58
-
59
-
60
-
61
-
62
-
63
-
64
-
65
-
66
-
67
-
68
-
 69
69 -
 70
70 -
 71
71 -
 72
72 -
 73
73 -
 74
74 -
 75
75 -
 76
76 -
 77
77 -
 78
78 -
 79
79 -
80
-
81
-
82
-
83
-
84
-
85
-
86
-
87
-
88
-
89
-
90
-
91
-
92
-
93
-
94
-
95
-
96
-
97
-
98
-
99
-
100
-
101
-
102
-
103
-
104
 |
 |