Gigabyte GA-Z77-HD4 Manual - Page 76
Installing EZ Smart Connect, A. System Requirements, B. Installation
 |
View all Gigabyte GA-Z77-HD4 manuals
Add to My Manuals
Save this manual to your list of manuals |
Page 76 highlights
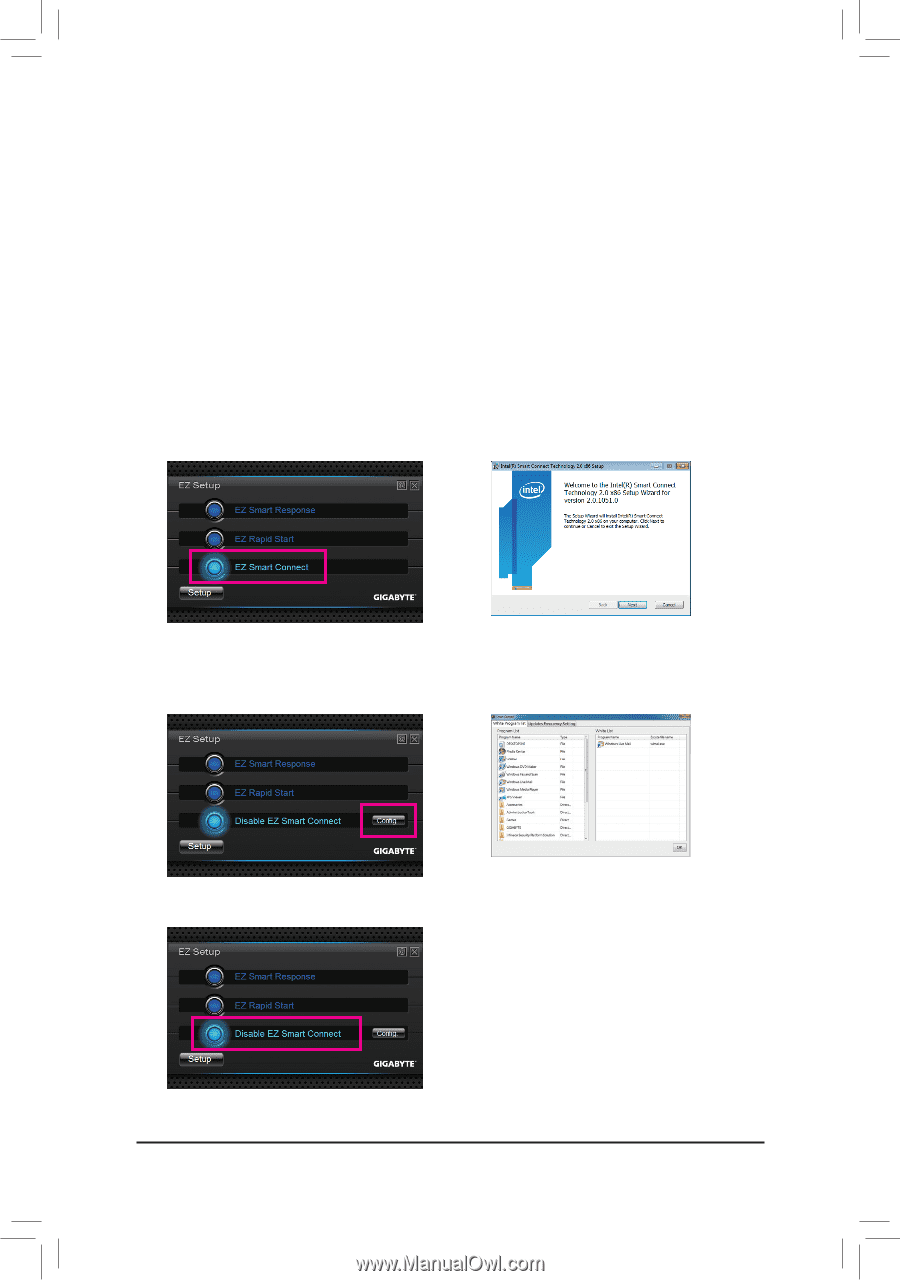
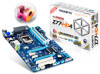
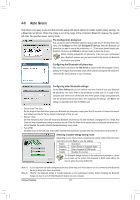
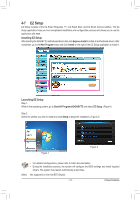
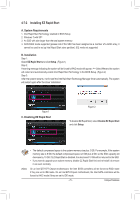
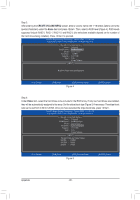
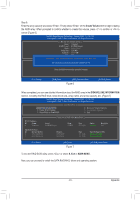
4-7-3 Installing EZ Smart Connect A. System Requirements 1. Intel Smart Connect Technology enabled in BIOS Setup 2. Windows 7 with SP1 3. Normal network connection 4. Programs added to the White List must be enabled B. Installation Step 1: Select EZ Smart Connect and click Setup. Then restart your system. The system will restart and automatically enable Intel Smart Connect Technology in the BIOS Setup. (Figure 1) Step 2: Launch EZ Setup again, select EZ Smart Connect, and then click Setup. Follow the on-screen instructions to install the Intel Smart Connect Technology driver (Figure 2). Restart your system after the driver installation. Figure 1 Figure 2 C. Configuring EZ Smart Connect Select Config (Figure 3) and add new programs to the White Program list (Note ) (Figure 4). Then click OK and restart the system. Figure 3 D. Disabling EZ Smart Connect Figure 4 To disable EZ Smart Connect, select Disable EZ Smart Connect and click Setup. (Note) This feature works best with programs designed to work automatically with the Internet to obtain their data such as Microsoft Outlook®, Microsoft Windows Live™ Mail, and Seesmic®. Unique Features - 76 -
-
 1
1 -
2
-
3
-
4
-
5
-
6
-
7
-
8
-
9
-
10
-
11
-
12
-
13
-
14
-
15
-
16
-
17
-
18
-
19
-
20
-
21
-
22
-
23
-
24
-
25
-
26
-
27
-
28
-
29
-
30
-
31
-
32
-
33
-
34
-
35
-
36
-
37
-
38
-
39
-
40
-
41
-
42
-
43
-
44
-
45
-
46
-
47
-
48
-
49
-
50
-
51
-
52
-
53
-
54
-
55
-
56
-
57
-
58
-
59
-
60
-
61
-
62
-
63
-
64
-
65
-
66
-
67
-
68
-
69
-
70
-
 71
71 -
 72
72 -
 73
73 -
 74
74 -
 75
75 -
 76
76 -
 77
77 -
 78
78 -
 79
79 -
 80
80 -
 81
81 -
82
-
83
-
84
-
85
-
86
-
87
-
88
-
89
-
90
-
91
-
92
-
93
-
94
-
95
-
96
-
97
-
98
-
99
-
100
-
101
-
102
-
103
-
104
 |
 |