Gigabyte GS-R12P4G Manual - Page 22
GS-R12P8G Hard Disk Drive Installation
 |
View all Gigabyte GS-R12P4G manuals
Add to My Manuals
Save this manual to your list of manuals |
Page 22 highlights
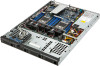
2-7-1 GS-R12P8G Hard Disk Drive Installation Follow these instructions to install the Hard disk drive: 1. Press the release button. 2. Pull the locking lever to remove the HDD tray. 3. Slide hard disk into blank. 4. Secure the hard drive to the tray with four (4) screws as shown. Do not over tighten thescrews. Slide the blank into the bay until it locks into place. 3 2 4 4 1 2 Hardware Installation - 22 -
-
 1
1 -
2
-
3
-
4
-
5
-
6
-
7
-
8
-
9
-
10
-
11
-
12
-
13
-
14
-
15
-
16
-
 17
17 -
 18
18 -
 19
19 -
 20
20 -
 21
21 -
 22
22 -
 23
23 -
 24
24 -
 25
25 -
 26
26 -
 27
27 -
28
-
29
-
30
-
31
-
32
-
33
-
34
-
35
-
36
-
37
-
38
-
39
-
40
-
41
-
42
-
43
-
44
-
45
-
46
-
47
-
48
-
49
-
50
-
51
-
52
-
53
-
54
-
55
-
56
-
57
-
58
-
59
-
60
-
61
-
62
-
63
-
64
-
65
-
66
-
67
-
68
-
69
-
70
-
71
-
72
-
73
-
74
 |
 |

Hardware Installation
- 22 -
2-7-1
GS-R12P8G Hard Disk Drive Installation
Follow these instructions to install the Hard disk drive:
1.
Press the release button.
2.
Pull the locking lever to remove the HDD tray.
3.
Slide hard disk into blank.
4.
Secure the hard drive to the tray with four (4) screws as shown. Do not over tighten thescrews.
Slide the blank into the bay until it locks into place.
1
3
4
4
2
2