Gigabyte GV-RX26T256H Manual - Page 11
to enable the ATI, CrossFire, technology - drivers
 |
View all Gigabyte GV-RX26T256H manuals
Add to My Manuals
Save this manual to your list of manuals |
Page 11 highlights
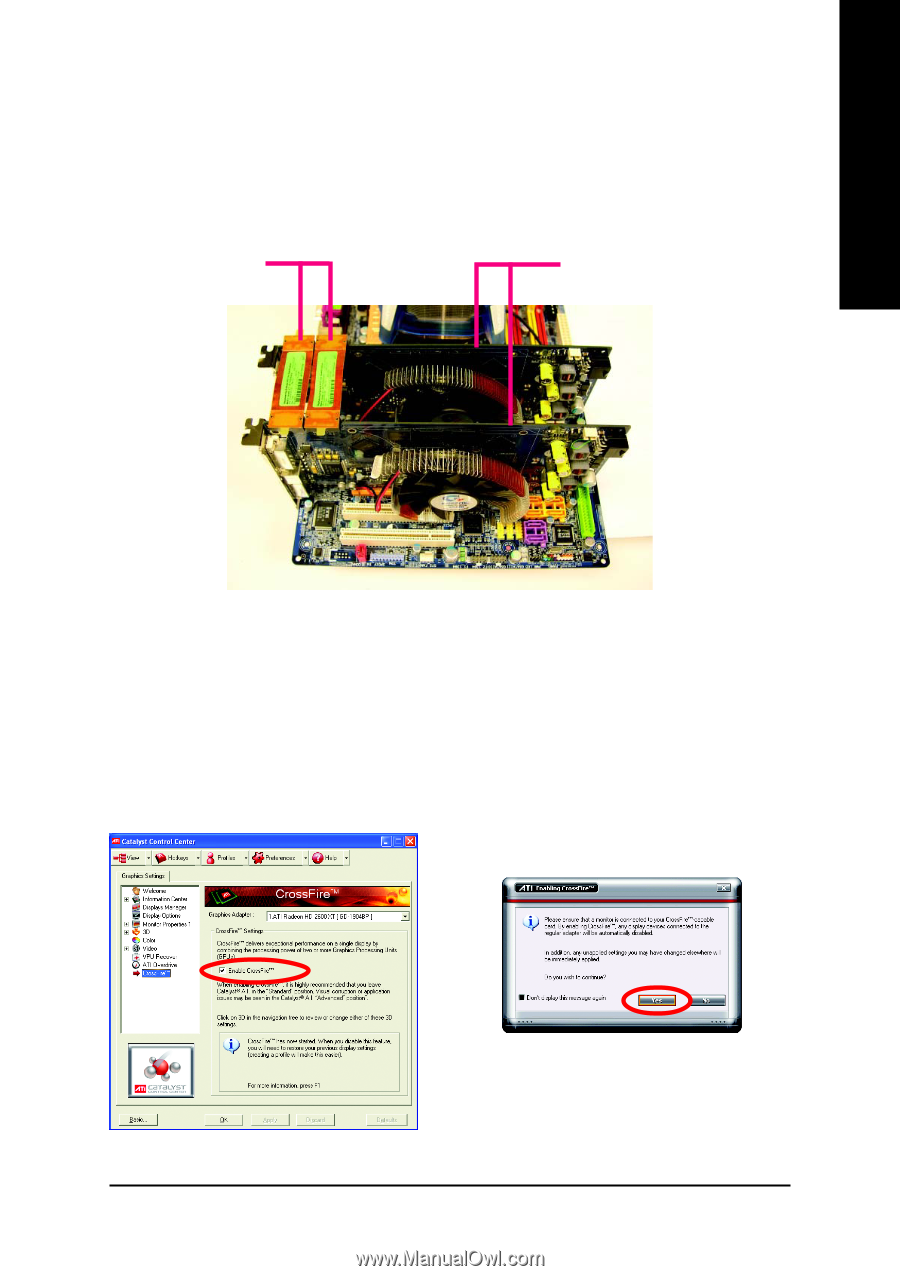
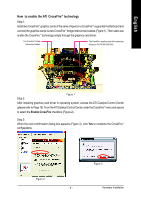
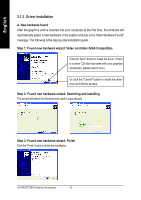
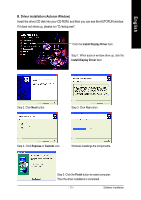
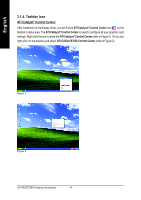
English How to enable the ATI CrossFireTM technology Step 1: Install two CrossFireTM graphics cards of the same chipset on a CrossFireTM-supported motherboard and connect the graphics cards via two CrossFireTM bridge interconnect cables (Figure 1). Then users can enable the CrossFireTM technology simply through the graphics card driver. Two CrossFireTM bridge interconnect cables. Two CrossFireTM graphics cards of the same type. (Example: GV-RX195P256D-RH) Figure 1 Step 2: After installing graphics card driver in operating system, access the ATI Catalyst Control Center (please refer to Page 19). From the ATI Catalyst Control Center, enter the CrossFireTM menu and assure to select the Enable CrossFire checkbox (Figure 2). Step 3: When the next confirmation dialog box appears (Figure 3), click Yes to complete the CrossFireTM configurations. Figure 2 Figure 3 - 9 - Hardware Installation
-
 1
1 -
2
-
3
-
4
-
5
-
 6
6 -
 7
7 -
 8
8 -
 9
9 -
 10
10 -
 11
11 -
 12
12 -
 13
13 -
 14
14 -
 15
15 -
 16
16 -
17
-
18
-
19
-
20
-
21
-
22
-
23
-
24
-
25
-
26
-
27
-
28
-
29
-
30
-
31
-
32
-
33
-
34
-
35
-
36
 |
 |