Gigabyte MW50-SV0 Manual - Page 16
the cover. Save the cover properly and always replace
 |
View all Gigabyte MW50-SV0 manuals
Add to My Manuals
Save this manual to your list of manuals |
Page 16 highlights
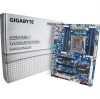
Lever B Lever A Step 5: Step 6: Once the CPU is properly inserted, carefully replace the Finally, secure lever A under its retention tab to load plate. Then secure lever B under its retention tab. complete the installation of the CPU. The protective plastic cover may pop off from the load plate during the process of engaging the lever. Remove the cover. Save the cover properly and always replace it when the CPU is not installed. Hardware Installation - 16 -
-
 1
1 -
2
-
3
-
4
-
5
-
6
-
7
-
8
-
9
-
10
-
 11
11 -
 12
12 -
 13
13 -
 14
14 -
 15
15 -
 16
16 -
 17
17 -
 18
18 -
 19
19 -
 20
20 -
 21
21 -
22
-
23
-
24
-
25
-
26
-
27
-
28
-
29
-
30
-
31
-
32
-
33
-
34
-
35
-
36
-
37
-
38
-
39
-
40
-
41
-
42
-
43
-
44
-
45
-
46
-
47
-
48
-
49
-
50
-
51
-
52
-
53
-
54
-
55
-
56
-
57
-
58
-
59
-
60
-
61
-
62
-
63
-
64
-
65
-
66
-
67
-
68
-
69
-
70
-
71
-
72
-
73
-
74
-
75
-
76
-
77
-
78
-
79
-
80
-
81
-
82
-
83
-
84
-
85
-
86
-
87
-
88
-
89
-
90
-
91
-
92
-
93
-
94
-
95
-
96
-
97
-
98
-
99
-
100
-
101
-
102
-
103
-
104
-
105
-
106
-
107
-
108
-
109
-
110
-
111
-
112
-
113
-
114
-
115
-
116
-
117
-
118
-
119
-
120
-
121
-
122
-
123
-
124
-
125
-
126
-
127
-
128
-
129
-
130
-
131
 |
 |

Hardware Installation
- 16 -
Step 5:
Once the CPU is properly inserted, carefully replace the
load plate. Then secure lever B under its retention tab.
The protective plastic cover may pop off from the load
plate during the process of engaging the lever. Remove
the cover. Save the cover properly and always replace it
when the CPU is not installed.
Lever B
Lever A
Step 6:
Finally, secure lever A under its retention tab to
complete the installation of the CPU.