Haier DE65EJ User Manual - Page 6
Proper Use & Care - dehumidifier
 |
UPC - 688057349558
View all Haier DE65EJ manuals
Add to My Manuals
Save this manual to your list of manuals |
Page 6 highlights
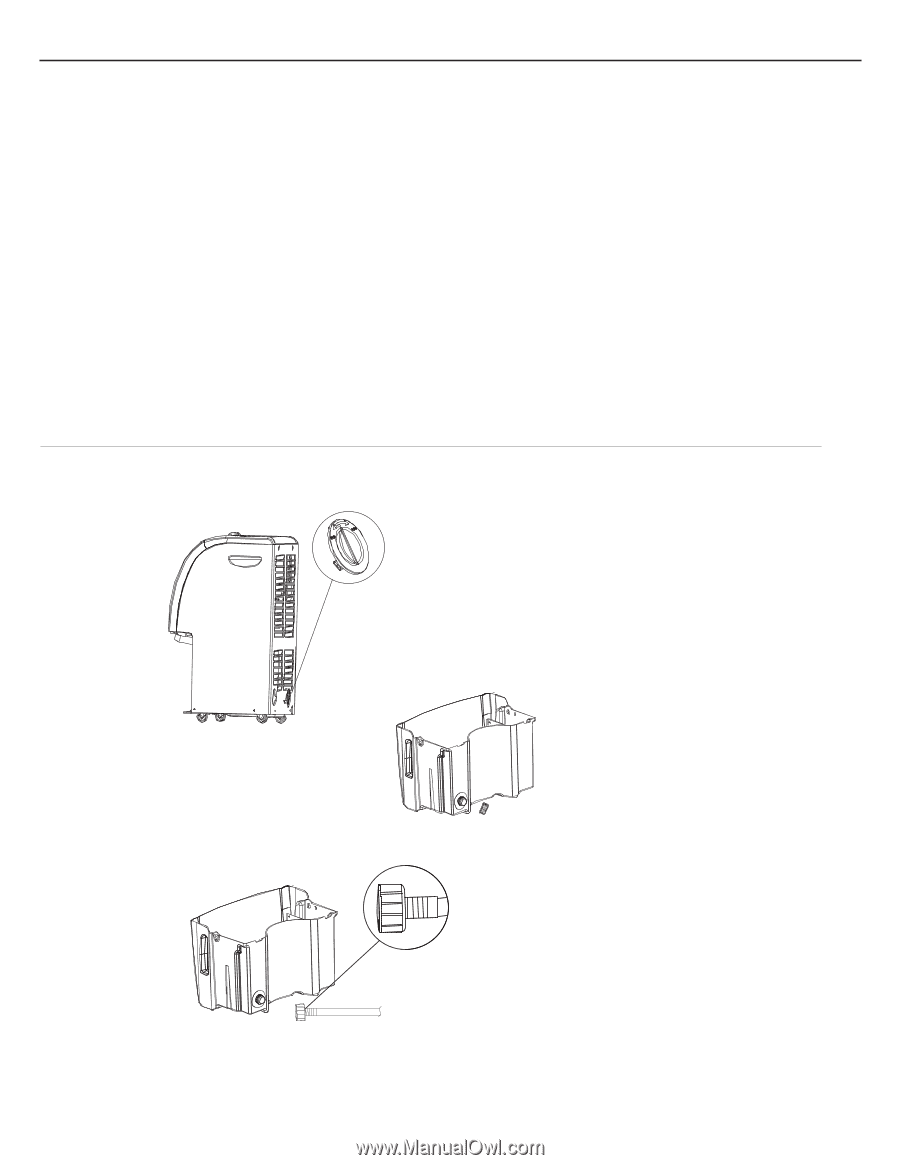
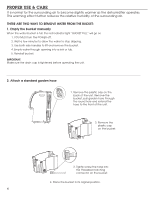
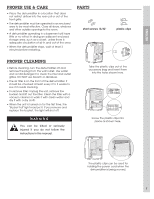
PROPER USE & CARE It is normal for the surrounding air to become slightly warmer as the dehumidifier operates. This warming effect further reduces the relative humidity of the surrounding air. THERE ARE TWO WAYS TO REMOVE WATER FROM THE BUCKET: 1. Empty the bucket manually When the water bucket is full, the red indicator light "BUCKET FULL" will go on. 1. YOU MUST turn the POWER off. 2. Wait a few minutes to allow the water to stop dripping. 3. Use both side handles to lift and remove the bucket. 4. Empty water through opening into a sink or tub. 5. Reinstall bucket. IMPORTANT Make sure the drain cap is tightened before operating the unit. 2. Attach a standard garden hose 1. Remove the plastic cap on the back of the unit. Remove the bucket, pull garden hose through the round hole and extend the hose to the front of the unit. 2. Remove the plastic cap on the bucket. 3. Tightly screw the hose into the threaded matching connector on the bucket. 4. Place the bucket in its original position. 6
-
 1
1 -
 2
2 -
 3
3 -
 4
4 -
 5
5 -
 6
6 -
 7
7 -
 8
8 -
 9
9 -
 10
10 -
 11
11 -
 12
12 -
13
-
14
-
15
-
16
-
17
-
18
-
19
-
20
-
21
-
22
-
23
-
24
-
25
-
26
-
27
-
28
 |
 |