Haier DW9-CBE7 User Manual - Page 8
Stage 5, Stage 6, Stage 7, Stage 8
 |
View all Haier DW9-CBE7 manuals
Add to My Manuals
Save this manual to your list of manuals |
Page 8 highlights
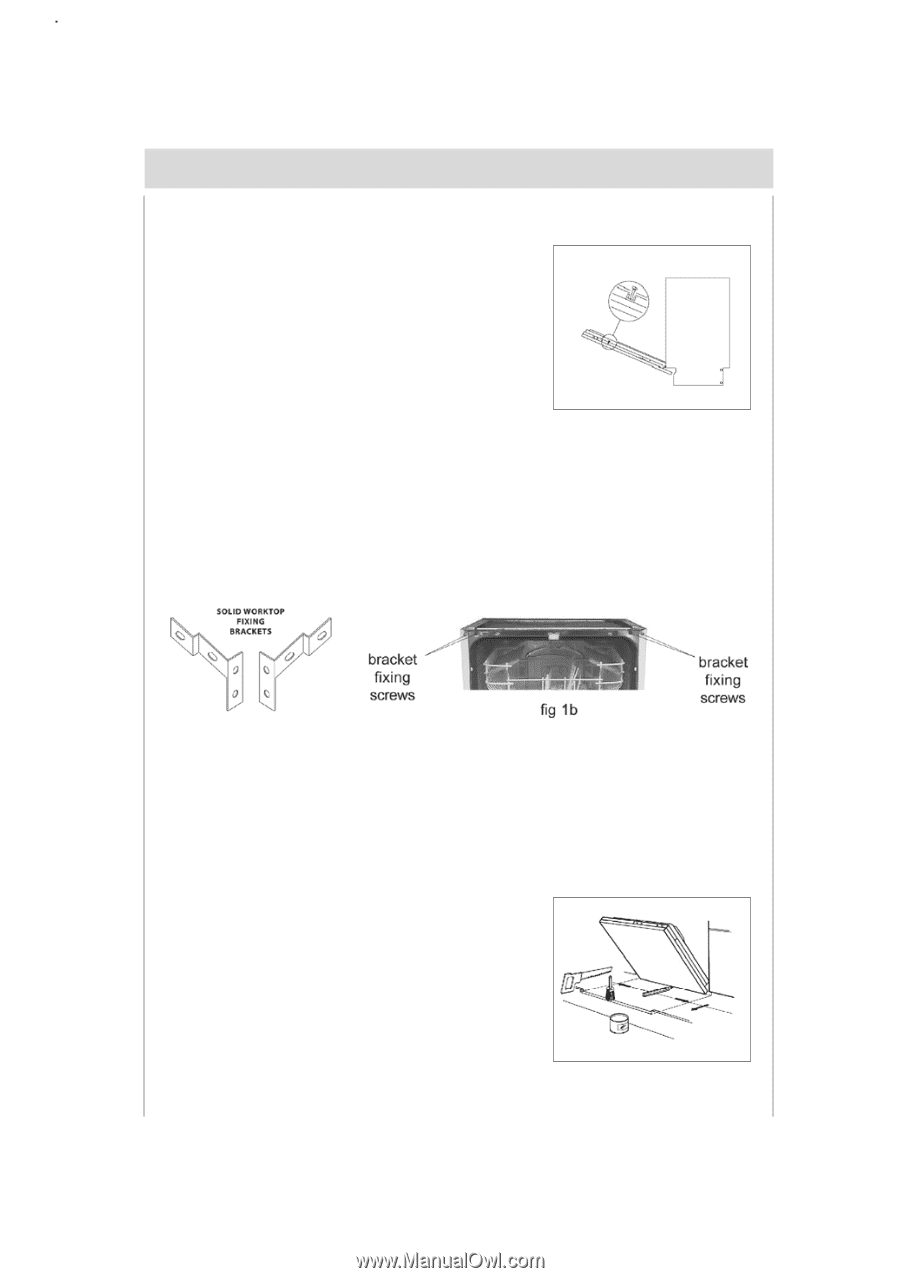
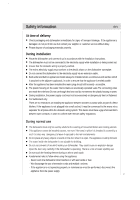
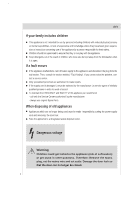
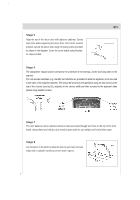
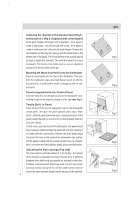
en Stage 5 Align the top of the decor door with adjacent cabinets. Gently open door whilst supporting the decor door. Once in the lowered position, secure the decor door using the fixing screws provided as shown in the diagram. Cover the screw heads using the plastic caps provided. Stage 6 The dishwasher should now be screwed to the underside of the worktop, via the two fixing holes in the top trim. For non-wooden worktops (e.g. marble) two brackets are provided to allow the appliance to be secured to the sides of the adjacent cabinets. The should be secured to the appliance using the two screws at the top of the chassis (see fig 1b), adjusted to the correct width and then screwed to the adjacent sides panels using suitable screws. Stage 7 The door balance can be adusted via two screws accessed through two holes in the top of the front frame. Adjust these until the door just remains open under its own weight and is level when open. Stage 8 Cut clearance in the plinth to allow the door to open fully and seal edges with a suitable varnish to prevent water ingress. 7
-
 1
1 -
2
-
 3
3 -
 4
4 -
 5
5 -
 6
6 -
 7
7 -
 8
8 -
 9
9 -
 10
10 -
 11
11 -
 12
12 -
 13
13 -
14
-
15
-
16
-
17
-
18
-
19
-
20
-
21
-
22
-
23
-
24
-
25
-
26
-
27
-
28
-
29
-
30
-
31
-
32
-
33
-
34
-
35
 |
 |