Haier GDG750AW User Manual - Page 6
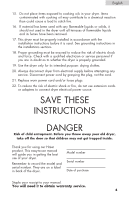
Save These Instructions
 |
View all Haier GDG750AW manuals
Add to My Manuals
Save this manual to your list of manuals |
Page 6 highlights
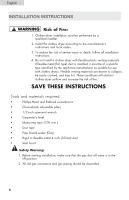
English INSTALLATION INSTRUCTIONS WARNING Risk AoTTfENFTiIOreN: 1. ClothÓesNdryePrRiEnCsAtaUlClaItioÓnNmust be performed by a qualified installer. 2. Install the clothes dryer according to the manufacturer's instructions and local codes. 3. To reduce the risk of severe injury or death, follow all installation instructions. 4. Do not install a clothes dryer with flexible plastic venting materials. If flexible metal (foil type) duct is installed, it must be of a specific type identified by the appliance manufacturer as suitable for use with clothes dryers. Flexible venting materials are known to collapse, be easily crushed, and trap lint. These conditions will obstruct clothes dryer airflow and increase the risk of fire. SAVE THESE INSTRUCTIONS Tools and materials required • Phillips-Head and flathead screwdrivers • Channel-lock adjustable pilers • 1/2-inch open-end wrench • Carpenter's level • Measuring tape (12ft. min.) • Duct tape • Pipe thread sealer (Gas) • Rigid or flexible metal 4 inch (102cm) duct • Vent hood Safety Warning: 1. Before starting installation, make sure that the gas shut off valve is in the off position. 2. All old gas connectors and gas piping should be discarded. 5
-
 1
1 -
 2
2 -
 3
3 -
 4
4 -
 5
5 -
 6
6 -
 7
7 -
 8
8 -
 9
9 -
 10
10 -
 11
11 -
 12
12 -
13
-
14
-
15
-
16
-
17
-
18
-
19
-
20
-
21
-
22
-
23
-
24
-
25
-
26
-
27
-
28
-
29
-
30
-
31
-
32
-
33
-
34
-
35
-
36
-
37
-
38
-
39
-
40
-
41
-
42
-
43
-
44
-
45
-
46
-
47
-
48
-
49
-
50
-
51
-
52
-
53
-
54
-
55
-
56
-
57
-
58
-
59
-
60
-
61
-
62
-
63
-
64
-
65
-
66
-
67
-
68
-
69
-
70
-
71
-
72
-
73
-
74
-
75
-
76
-
77
-
78
-
79
-
80
-
81
-
82
-
83
-
84
-
85
-
86
-
87
-
88
-
89
-
90
-
91
-
92
 |
 |
