Haier HDV70A1 user manual - Page 10
Free standing
 |
View all Haier HDV70A1 manuals
Add to My Manuals
Save this manual to your list of manuals |
Page 10 highlights
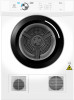
INSTALLATION INSTRUCTIONS Free standing The dryer stands on the floor and can easily be moved into position. 1 Move the dryer into the desired position. Do not lift the dryer by the top panel. 2 Have a minimum clearance on all sides of at least 20mm. 3 Have a minimum clearance at the rear of 75mm. 4 Install the dryer on a stable and level floor. Suitable for Cotton Synthetic Mix Prohibited for Jeans Sports Shirt Downy Wool Silk 7kg IMPORTANT! Do not put the heavy loads on the top of your dryer, eg the wet clothes that were taken out of the washing machine. Before a rear venting option is installed the dryer must be changed from the front venting factory setup. Remove the outlet grille from the front left-hand side and replace with the outlet cover from the rear left-hand side. These covers should be gently pried at the sides to prevent damage. Outlet cover Outlet grille 8
-
 1
1 -
2
-
3
-
4
-
 5
5 -
 6
6 -
 7
7 -
 8
8 -
 9
9 -
 10
10 -
 11
11 -
 12
12 -
 13
13 -
 14
14 -
 15
15 -
16
-
17
-
18
 |
 |
