Haier HDY60M User Manual - Page 6
Wall Mounting Instructions
 |
View all Haier HDY60M manuals
Add to My Manuals
Save this manual to your list of manuals |
Page 6 highlights
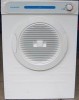
WALL MOUNTING INSTRUCTIONS 3. To install the hook to the dryer, remove the 2 screws and 2 corks as indicated in Fig. 1. 2 screws 2 corks Fig. 1 4. Align hooks as shown in Fig. 2 and each hook should .be fixed up well with three screws. Install the spacers provided as Fig. 2 Hooks 3 screws Spacers Fig. 2 10 WALL MOUNTING INSTRUCTIONS 5. With assistance, mount dryer on wall brackets. See Fig. 3 Fig. 3 6. A new control panel film with inverted symbols supplied. Peel the release paper from the back of inverted film then place the film on the surface so that writing is the correct way up. 200min 100min 150min HDY60M Cool Warm HDY60M 30min OFF 60min 60min 20min OFF 100min 150min 200min 60min OFF 30min 20min OFF 60min 11
-
 1
1 -
 2
2 -
 3
3 -
 4
4 -
 5
5 -
 6
6 -
 7
7
 |
 |

3. To install the hook to the dryer, remove the 2 screws and 2
corks as indicated in Fig. 1.
4. Align hooks as shown in Fig. 2 and each hook should be fixed
up well with three screws. Install the spacers provided as Fig. 2
.
2 screws
2 corks
Fig. 1
Fig. 2
Hooks
Spacers
5. With assistance, mount dryer on wall brackets. See Fig. 3
Fig. 3
6. A new control panel film with inverted symbols
supplied.
Peel the
release paper from the back of inverted film
then place
the film
on
t
he
surface so that writing is the
correct way up
.
3 screws
HDY60M
HDY60M
Cool
Warm
150min
200min
100min
60min
20min
OFF
OFF
60min
30min
150min
200min
100min
60min
20min
OFF
60min
30min
OFF
10
11
WALL MOUNTING INSTRUCTIONS
WALL MOUNTING INSTRUCTIONS