Hamilton Beach 52737 Use & Care - Page 6
Hints for General Use, Control Panels
 |
UPC - 040094527373
View all Hamilton Beach 52737 manuals
Add to My Manuals
Save this manual to your list of manuals |
Page 6 highlights
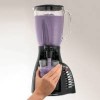
840153700 ENv02.qxd 6/22/06 5:16 PM Page 6 Control Panels Your blender may have 8 to 12 speeds. They all operate similarly. For blenders with 10 or more speeds, first select and push a LO or HI power button then push desired speed button. When using PULSE or IceBreaker the blender will operate only as long as button is pushed. The remaining speed buttons will run the blender until OFF is pushed. NOTES: • Speed increases as the buttons are pushed top to bottom. • The dispenser button also serves as the highest speed at which the blender will operate. It is important to turn the blender on by pressing the dispense button when dispensing the thick contents of the jar. Hints for General Use NOTE: After extended blending, especially dry food, you may notice a black film inside the top of the blender base. This is a normal, FDA-approved, foodgrade lubricant used to ensure the long-life of your cutting assembly. • Processing hot foods or liquids in the blender may cause hot liquid to spurt out when the lid is removed. Always remove the filler cap of the cover before blending hot foods or liquids. When blending hot liquids, remove center piece of two-piece lid. Do not fill blender jar beyond the 3-cup (750 ml) level. Remove filler cap and, with the protection of an oven mitt or thick towel, place hand on top of the blender jar lid and hold down while blending. Always begin processing at lowest speed setting. Ensure skin and hands are covered to reduce the risk of burns. • To add foods when blender is operating, remove filler cap from container lid and add ingredients through the opening. • Do not store food or liquids in the blender jar. • For best performance, the minimum amount of liquid needed per recipe is one cup (8 ounces/250 ml). Add more liquid if food is not blending properly • If blending action stops during blending or ingredients stick to sides of the jar, there may not be enough liquid in the jar to blend effectively. • Do not try to mash potatoes, mix stiff dough, whip egg whites, grind raw meat, or extract juices from fruits and vegetables. The blender is not made to perform these tasks. • If food being processed (solid food or ultra-thick beverages) will not dispense, pour from jar. • Avoid bumping or dropping the blender. 6
-
 1
1 -
 2
2 -
 3
3 -
 4
4 -
 5
5 -
 6
6 -
 7
7 -
 8
8 -
 9
9 -
 10
10 -
 11
11 -
 12
12 -
13
-
14
-
15
-
16
-
17
-
18
-
19
-
20
-
21
-
22
-
23
-
24
-
25
-
26
-
27
-
28
-
29
-
30
-
31
-
32
-
33
-
34
-
35
-
36
 |
 |
