Harbor Freight Tools 60561 User Manual - Page 3
Assembly Instructions
 |
View all Harbor Freight Tools 60561 manuals
Add to My Manuals
Save this manual to your list of manuals |
Page 3 highlights
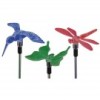
Assembly Instructions Read the ENTIRE IMPORTANT SAFETY INFORMATION section at the beginning of this document including all text under subheadings therein before set up or use of this product. Note: For additional information regarding the parts listed in the following pages, refer to the Assembly Diagram near the end of this manual. Assembly 1. Unthread the two screws on the battery cover and remove the battery cover. 2. Insert the AA battery into the battery housing paying attention to the polarity. 3. Replace the Battery cover and secure with the screws. 4. Set one of the Decorative LED Shapes (2) onto the Top Tube (3). Slide the Top Tube (3), into the Bottom Tube (4). Slide the Stake (5) onto the Bottom Tube (4). 5. Repeat steps 1 - 3 for the other two light sets. Functions Decorative LED Shape (2) Battery Cover (9) (On back of Solar Panel) Power Switch (7) (On back of Solar Panel) Top Tube (3) Solar Panel (1) Bottom Tube (4) Figure A Stake (5) Item 60561 For technical questions, please call 1-800-444-3353. Page 3
-
 1
1 -
 2
2 -
 3
3 -
 4
4 -
 5
5 -
 6
6 -
 7
7 -
 8
8
 |
 |
