Harbor Freight Tools 61969 User Manual - Page 12
Using the Depth Stop, Workpiece and Work Area Set Up
 |
View all Harbor Freight Tools 61969 manuals
Add to My Manuals
Save this manual to your list of manuals |
Page 12 highlights
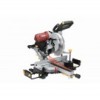
SAFETY SETUP Using the Depth Stop If a kerfing or rabbet cut which does not cut through the workpiece is desired, use the Depth Stop Bolt to control the depth of the cut. WARNING! Only adjust the front Bolt. The rear Bolt is used to prevent the Blade from cutting the table during normal cutting. Do not adjust the rear Depth Bolt. 1. Unlock the Head Lock-down, see page 9. 2. Raise the saw head assembly. 3. Push the Depth Stop to the left to use the Depth Stop Bolt setting. 4. Pull down on the saw head to check the current setting. 5. To change the setting, first loosen the knurled Depth Stop Nut on the Depth Stop Bolt. Turn the Depth Stop Bolt clockwise to decrease depth and counterclockwise to increase depth. Tighten the Depth Stop Nut after adjustment. Figure D 6. If needed, push the Depth Stop to the right to temporarily disable it. Make sure the Depth Stop is properly aligned to allow the Bolt to pass through it. Depth Stop Bolt (136) Depth Stop Nut (137) Depth Stop (44) Workpiece and Work Area Set Up 1. Designate a work area that is clean and well‑lit. The work area must not allow access by children or pets to prevent injury and distraction. 2. Route the power cord along a safe route to reach the work area without creating a tripping hazard or exposing the power cord to possible damage. The power cord must reach the work area with enough extra length to allow free movement while working. 3. Allow room on both left and right of saw for extended workpieces. 4. Use a saw table, saw stand or other means to support the workpiece. Mount the Miter Saw so that the surface is level to the ground, and additional supports provide a surface on the same level as the saw table. If the work surface and any workpiece supports are not level, and on the same level, unwanted bevel angles will appear in the cuts resulting in poor joinery. 5. Secure workpieces to the saw table using the Clamp or other clamping devices (not included). Securing the workpiece will provide safety by preventing kick back and by removing the need to hold workpieces near the blade by hand. Clamping the workpiece will also improve cutting accuracy by preventing the workpiece from moving during the cutting operation. OPERATION MAINTENANCE Page 12 For technical questions, please call 1-888-866-5797. Item 61969
-
 1
1 -
2
-
3
-
4
-
5
-
6
-
 7
7 -
 8
8 -
 9
9 -
 10
10 -
 11
11 -
 12
12 -
 13
13 -
 14
14 -
 15
15 -
 16
16 -
 17
17 -
18
-
19
-
20
 |
 |
