Harbor Freight Tools 61969 User Manual - Page 13
Danger
 |
View all Harbor Freight Tools 61969 manuals
Add to My Manuals
Save this manual to your list of manuals |
Page 13 highlights
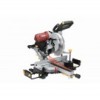
SAFETY General Operating Instructions DANGER! MITER SAWS CAN QUICKLY AMPUTATE FINGERS IF MISUSED. Keep hands well clear of cutting area. 1. Unlock the Head Lock-down, see page 9. 2. Make sure all adjustment knobs are tight (Miter Knob, Bevel Lock Knob, Fence and Table Extension Knobs). 3. Blow any sawdust or debris away from the Fence. Place the work material against the Fence. 4. Align the marked location of the cut on the work material with the saw blade. Note: To prevent your workpiece from being cut too short, align the edge of the blade with your measured mark, keeping the rest of the blade on the waste side of the cut. 5. Hold the work material in place using the Clamp. Ensure that the work material is level and supported securely, use saw horses or supports if necessary. 7. Press down lightly to cut the material. With narrow material, press straight down "chopping" the material. With wide material, move the Blade across the material while cutting. Do not bear down on the material, use light downward pressure. If the material binds the blade, release the trigger. 8. When the cut is completed, raise the blade assembly, release the trigger, wait for the Blade to stop turning, release the Clamp and remove the work material from the saw. 9. To prevent accidents, turn off the tool and disconnect its power supply after use. Clean, then store the tool indoors out of children's reach. 6. Grip the Saw Handle, press one of the Trigger Locks with your thumb, and squeeze the Trigger to start the Saw and the laser guide. Note: If the laser guide line does not line up with the cut line, release trigger and reposition workpiece before making the cut. SETUP OPERATION MAINTENANCE Item 61969 For technical questions, please call 1-888-866-5797. Page 13
-
 1
1 -
2
-
3
-
4
-
5
-
6
-
7
-
 8
8 -
 9
9 -
 10
10 -
 11
11 -
 12
12 -
 13
13 -
 14
14 -
 15
15 -
 16
16 -
 17
17 -
 18
18 -
19
-
20
 |
 |
