Harman Kardon AVR 1510 Owners Manual - Page 18
Connect the Trigger Output, Connect to AC Power - avr 1510s
 |
View all Harman Kardon AVR 1510 manuals
Add to My Manuals
Save this manual to your list of manuals |
Page 18 highlights
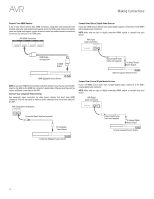
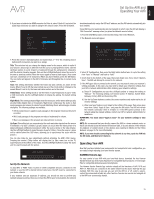
AVR Connect the Trigger Output If your system has equipment that can be controlled by a DC trigger signal, connect it to the AVR's Trigger Out connector with a mono 1/8-inch (3.5mm) mini-plug interconnect cable. The AVR will supply a 12V DC (100mA) trigger signal at this connection whenever it is powered on. Mono 1/8-inch (3.5mm) Mini-Plug Interconnect (not supplied) AVR Device with Trigger In Connector Connect to AC Power AVR 151: Connect the supplied AC power cord to the AVR's AC Input connector and then to a working, non-switched AC power outlet. AVR AC Input Connector AC Power Outlet Power Cord (supplied) AVR 1510: Connect the AVR's power cord to a working, non-switched AC power outlet. AVR Power Cord AC Power Outlet 18 Making Connections
-
 1
1 -
2
-
3
-
4
-
5
-
6
-
7
-
8
-
9
-
10
-
11
-
12
-
 13
13 -
 14
14 -
 15
15 -
 16
16 -
 17
17 -
 18
18 -
 19
19 -
 20
20 -
 21
21 -
 22
22 -
 23
23 -
24
-
25
-
26
-
27
-
28
-
29
-
30
-
31
-
32
-
33
-
34
-
35
-
36
-
37
-
38
-
39
-
40
-
41
-
42
-
43
-
44
-
45
-
46
-
47
 |
 |
