Harman Kardon AVR 1710 Owners Manual - Page 25
Operating Your AVR - harman
 |
View all Harman Kardon AVR 1710 manuals
Add to My Manuals
Save this manual to your list of manuals |
Page 25 highlights
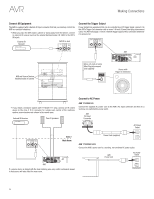
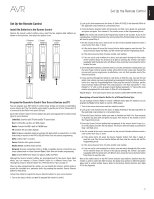
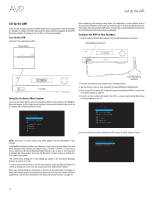
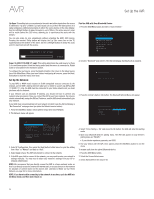
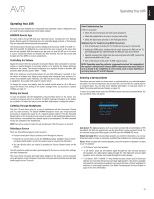
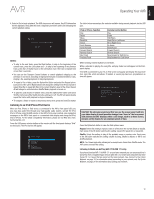
English AVR Operating Your AVR Operating Your AVR Now that you have installed your components and completed a basic configuration, you are ready to begin enjoying your home theater system. HARMAN Remote App For easy control of your AVR with your hand-held device, download the free Harman Kardon Remote app from iTunes App Store for compatible Apple products, or from Google Play for compatible Android powered smartphones. The Harman Kardon Remote App controls virtually all the functions of AVR 1710, AVR 171, AVR 1610 and AVR 161 AVRs that are connected to the same network as the device that has the app installed. With this easy-to-use app you can turn the AVR on or off, select a source, control the volume and virtually any other function. You can also access and navigate all of the AVR's on-screen setup menus. Controlling the Volume Adjust the volume either by turning the front-panel Volume knob (clockwise to increase volume or counterclockwise to decrease volume) or by pressing the Volume Up/Down buttons on the remote. The volume is displayed as a negative number of decibels (dB) below the 0dB reference point (-80dB - +10dB). 0dB is the maximum recommended volume for your AVR. Although it's possible to turn the volume to a higher level, doing so may damage your hearing and your speakers. For certain more dynamic audio materials, even 0dB may be too high, allowing for damage to equipment. Use caution with regard to volume levels. To change the volume level display from the default decibel scale to a 0-to-90 scale, adjust the Volume Units setting in the System Settings menu, as described in System Settings, on page 34. Muting the Sound To mute all speakers and the headphones, press the Mute button on the remote. Any recording in progress will not be affected. The MUTE message will appear in the display as a reminder. To restore the sound, press the Mute button again, or adjust the volume. Listening Through Headphones Plug the 1/4-inch stereo plug on a pair of headphones into the front-panel Phones jack for private listening. The default HARMAN Headphone mode uses virtual surround processing to emulate the sound of a 5.1-channel speaker system. Press the Surround Modes button on the front panel or the remote to switch to the Headphone Bypass mode, which delivers a conventional two-channel signal to the headphones. No other surround modes are available for the headphones. NOTE: You will be unable to listen through headphones if the iPod source is selected. Selecting a Source There are three different ways to select a source: • Press the front-panel Source buttons to scroll through the sources. • Using the on-screen menus, press the OSD/Menu button, highlight "Source Select" and press the OK button. Scroll to the desired source and press the OK button. • You can directly select any source by pressing its Source Selector button on the remote. The AVR selects the audio and video inputs assigned to the source, and any other settings you made during setup. The source name, the audio and video inputs assigned to the source, and the surround mode will appear on the front panel. The source name and active surround mode will also briefly appear on the TV screen. Video Troubleshooting Tips If there is no picture: • Check the source selection and video input assignment. • Check all connections for a loose or incorrect connection. • Check the video input selection on the TV/display device. Additional Tips for Troubleshooting HDMI Connections • Turn off all devices (including the TV, the AVR and any source components). • Unplug the HDMI cables, starting with the cable between the AVR and the TV, and continuing with the cables between the AVR and each source device. • Carefully reconnect the cables from the source devices to the AVR. Connect the cable from the AVR to the TV last. • Turn on the devices in this order: TV, AVR, source devices. NOTE: Depending upon the particular components involved, the complexity of the required communication between HDMI components may cause delays of up to a minute in the completion of some actions, such as input switching or switching between SD and HD channels. Selecting a Surround Mode Selecting a surround mode can be as simple or sophisticated as your individual system and tastes. Feel free to experiment, and you may find a few favorites for certain sources or program types. You can find more detailed information on surround modes in Audio Processing and Surround Sound, on page 29. To select a surround mode, press the OSD/Menu button and select Surround Mode. The Surround Mode menu will appear. Auto Select: For digital programs, such as a movie recorded with a Dolby Digital or DTS soundtrack, the AVR will automatically use the soundtrack's native surround format. For two-channel analog and PCM programs, the AVR uses the HARMAN NSP mode. Virtual Surround: When only two main speakers are present in the system, you can use Virtual Surround to create an enhanced soundfield that virtualizes the missing speakers. Stereo: When you want two-channel playback, select the number of speakers you want to use for playback: • "2 CH Stereo" uses two speakers. • "5 CH Stereo" plays the left-channel signal through the front left and surround left speakers, the right-channel signal through the front right and surround right speakers, and a summed mono signal through the center speaker. • "7 CH Stereo" (AVR 1710/AVR 171 only) follows the same scheme as 5 CH Stereo but adds the surround back left and surround back right speakers. This mode is available only when the surround back speakers are present and have not been reassigned to multizone or front height operation. See Audio Processing and Surround Sound, on page 29, for more information. 25
-
 1
1 -
2
-
3
-
4
-
5
-
6
-
7
-
8
-
9
-
10
-
11
-
12
-
13
-
14
-
15
-
16
-
17
-
18
-
19
-
 20
20 -
 21
21 -
 22
22 -
 23
23 -
 24
24 -
 25
25 -
 26
26 -
 27
27 -
 28
28 -
 29
29 -
 30
30 -
31
-
32
-
33
-
34
-
35
-
36
-
37
-
38
-
39
-
40
-
41
-
42
-
43
-
44
-
45
-
46
-
47
-
48
-
49
-
50
-
51
-
52
 |
 |
