Harman Kardon DC5500 Owners Manual - Page 4
INSTALLATION, Ismail
 |
View all Harman Kardon DC5500 manuals
Add to My Manuals
Save this manual to your list of manuals |
Page 4 highlights
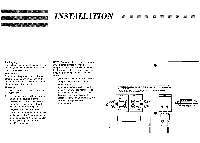
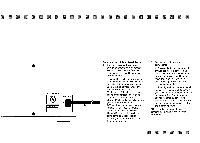
INSTALLATION • Ismail is■• Packaging Save all packing material. It is essential for shipping, should you move or in the event the unit ever needs repair. Placement The unit may be placed on top or beneath other stereo components, so long as its placement meets the cooling requirements of the component beneath it. Hook-up 1. Make sure all stereo components are turned off. 2. Use the cable provided to connect the left and right Input jacks of the cassette deck to the "Tape Monitor Output" jacks (sometimes labeled "Record") of your pre-amplifier, integrated amplifier, or receiver. 3. Connect the left and right Output jacks on the deck to the "Tape Input" jacks (sometimes labeled "Play" or "Monitor") on your pre-amplifier, integrated amplifier, or receiver. NOTE: If you are using an equalizer and/or other external signal processing components that are currently connected to the Tape Monitor loop of your receiver/preamp/integrated amplifier, you have two choices: 1. Connect the deck to the Tape Monitor loop provided on the last outboard component; or 2. If your receiver/pre-amp/integrated amplifier has two Tape Monitor loops, you may connect the cassette deck to the unused loop. (In this case, the cassette deck will be unaffected by the external signal processing components.) 3 DOLBY NOISE REDUCTION AND HX PRO HEADROOM EXTENSION MANUFACTURED UNDER LICENSE FROM DOLBY LABORATORIES LICENSING CORPORATION. HX PRO ORIGINATED BY BANG AND OLUFSEN. "DOLBY", THE DOUBLE-D SYMBOLMAND "HX PRO" ARE TRADEMARKS OF DOLBY LABORATORIES LICENSING CORPORATION. INPUT LEFT OO OUTPUT LEFT OO REMOTE IN OUT RIGHT RIGHT * 0 ,A CAUTION ,7\ RISK OF ELECTRIC SHOCK 00 ROTOR. AVIS: RISQUE DE CHOC ELECTRIQUE NE PAS OUVRIR
-
 1
1 -
 2
2 -
 3
3 -
 4
4 -
 5
5 -
 6
6 -
 7
7 -
 8
8 -
 9
9 -
 10
10 -
11
-
12
-
13
-
14
-
15
-
16
-
17
 |
 |
