Harman Kardon HD7225 Owners Manual - Page 8
Connections
 |
View all Harman Kardon HD7225 manuals
Add to My Manuals
Save this manual to your list of manuals |
Page 8 highlights
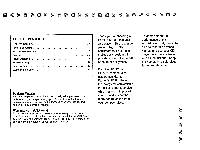
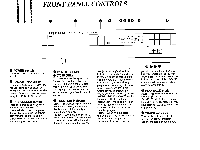
CONNECTIONS INDEX button Some discs contain long selections that may be subdivided into shorter sections (for example, operas). Just as the tracks are marked by the track number, these shorter sections may be marked by index numbers. When you have started playback of the desired track, you can use the INDEX UP and INDEX DOWN buttons to jump to a desired index selection. Each time you press and INDEX button, the INDEX indicator displays the next higher or lower index number. If you continue pressing the button until the indicated index number is higher than the actual number of index selections on the disc, playback will start from the nearest index selection. O Track selection buttons This set of buttons (numbered 1 through 10 and +10) enables you to directly select the track you want to play. To select a track with a number higher than 10, press the +10 button, then press the button that will add up to the number of the track you want. For example, to select track 14, press +10, than press 4. If you select a track number that does not exist on your disc, the TRACK indicator will BI E NO FEV.13 AUDIO MAMBO .ISED OUTPUT FIXED LEFT RIGHT CLASS 1 LASER PRODUCT REMOTE IN OUT COMPLIES WITH THE LIMITS FOR A CLASS B COMFUTING DEVICE PURSUANT TO SUBPARTJ OF PART 15 OF FCC RULES. COMPLIES WITH DHHS RULES 21 CFR CHAPTER I, SUBCHAPTER J. A` AVIS: REDuE DE CHOC ELECTRQuE-HE PAS SEEMS CERTIFIED ONLY TO CANADIAN ELECTRICAL CODE/ CEIRTFE SNEXMAIAIAID MODEL NO. II0, 225 16W SEPIA. NO AC .22E/MHz STe nom, O oO 0 CD 0 IN CUT CD 'o® 0 0 A, I ECV/E01-E TCNED iD.ti~i 5A I 0 Fau'i SEPIA, NO VCR IN Olir ,I0E0 CONNECTIONS 011 Ito GND A SAC A 0 AVIS: RISQUE DE CHOC ELECTRIQUE-NE PAS OUVFER continue to display the number of the last track on the disc. When PROGRAM mode is off, pressing a track button plays the track you select. When PROGRAM mode is on, pressing a track button programs that track into your sequence. Standard Connections Before you begin to connect this unit to your system, be sure that all components are turned off and unplugged from the electrical outlet. On the back of your HD7125/HD7225 are output jacks that connect your CD player to your receiver, integrated amplifier, or preamplifier. Using the supplied shielded cords, connect the left and right output jacks on the back of the CD player to the left and right input jacks marked CD or AUX on the back of your receiver/preamplifier/ integrated amplifier. Alternatively, you can also use the TAPE INPUT or TAPE PLAY jacks on your receiver/preamplifierfintegrated amplifier. Note: NEVER connect your CD player to the PHONO inputs. 7
-
 1
1 -
2
-
 3
3 -
 4
4 -
 5
5 -
 6
6 -
 7
7 -
 8
8 -
 9
9 -
 10
10 -
 11
11 -
 12
12 -
 13
13 -
14
-
15
 |
 |
