Harman Kardon HD7300 Owners Manual - Page 9
Open/Close
 |
View all Harman Kardon HD7300 manuals
Add to My Manuals
Save this manual to your list of manuals |
Page 9 highlights
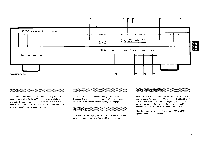
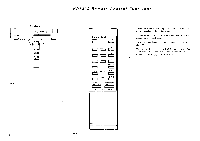
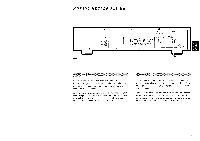
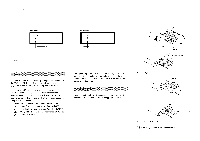
With care, a CD will last forever. However, dust, scratches or warps on the Compact Disc may lead to noise or playback problems. Hold the Compact Disc only by the outer edge, supporting it at the center hole with your index finger if necessary. Be careful not to touch the unprinted side of the disc. Never glue any labels or stickers to either side of the disc. If a CD does become dirty, clean it with a silicone cloth such as those used for cleaning camera lenses, or with a commercially available Compact Disc cleaning kit. NEVER use volatile chemical substances such as denatured alcohol, record cleaners intended for analog phonograph discs or antistatic fluids. Always return a CD to its plastic case after it is played and avoid storing the case in a location which is subject to direct sunlight, high humidity or high temperatures. Because of the extreme dynamic range made possible by digital recording, a sudden high volume may result if you attempt to adjust your volume control by "background noise level", the way you might with records or cassette tapes. To avoid damage to speakers or headphones, maintain a conservative volume level until you are familiar with the sonic performance of Compact Discs. 1. Turn on the HD7400/HD7300 with the Power switch. 2. Press the Open/Close button and load the Compact Disc with the printed surface facing up. If you are loading a 8 cm (3 inch) diameter compact disc, place it in the recessed area in the center of the disc tray (Figure 7). 3. Press the Open/Close button again or gently press the front of the disc tray. The final program number and total playback time will be displayed. 4. Press N- No (Play/Pause) on either the remote control or the HD7400/HD7300 front panel. • To stop play, press the button. • To momentarily pause during play, press the button. The UI indicator will light. Pressing resume play. •• again will • You can also stop play by pressing the Open/Close button. • Actually, it is not necessary to close the CD disc tray before play. When NN is pressed (Step 4), the tray automati- cally retracts and play begins. 1. While a CD is playing, press the m•-••-i or Skip) buttons repeatedly until the desired track number appears in the Track No. display. Pressing the i Skip) once returns to the beginning of the track currently -playing. • The player will instantly skip to the beginning of the displayed track and playback will start within a few seconds. 1. While a CD is playing, press the or M (Search) buttons until you locate the musical passage you wish to hear. • The sound will remain audible though speeded up, and the volume is automatically reduced. • To switch to rapid, inaudible search while in Manual Search, first press then r or If you wish, you may begin play at the start of any track on a CD. 1. After a CD has been loaded, press the (Skip Forward) button repeatedly until the Track No. display shows the track desired. 2. Press ► Ns to begin play from that track onward to the end of the CD. The HD7400/HD7300 will memorize a sequence of up to 36 track selections and then play them back in the order they were programmed. This may be 36 different songs, or a combination with individual songs repeated several times as part of the sequence. 1. After you have loaded a Compact Disc into the HD7400/ HD7300, press the Open/Close button but do NOT press any transport control buttons (such as ► , , etc.). Select the first track to be programmed by entering its number on the remote control 10-key pad (HD7400 only), or by repeatedly pressing on the front panel. The track number will appear in the Track No. display. 2. Press Program once. The PROG indicator will light and "P:01" will appear on the Track No. display. The track number selected is now entered as Program 1. 3. Select the next track to be programmed using the remote 10-key pad (HD7400 only) or (Skip) keys on the front panel. 4. Press Program again. "P:02" will appear on the Track No. display. This track is entered as Program 2. 5. Repeat steps 3 & 4 until up to 36 tracks have been programmed. 9
-
 1
1 -
2
-
3
-
 4
4 -
 5
5 -
 6
6 -
 7
7 -
 8
8 -
 9
9 -
 10
10 -
 11
11 -
 12
12
 |
 |