Harman Kardon HK1680 Owners Manual - Page 4
Owner's, manual, hk1680, Warning, Connections, Connecting, turntable, decks
 |
View all Harman Kardon HK1680 manuals
Add to My Manuals
Save this manual to your list of manuals |
Page 4 highlights
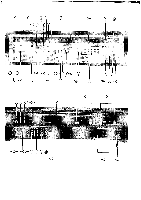
Owner's manual hk1680 Your investment in a component high fidelity system indicates you have a more than average interest in music. The fact that your investment includes a Harman Kardon Digital Synthesized Quartz-Locked Stereo Receiver shows us your appreciation of uncompromised reproduction of the music you enjoy. Throughout the design and manufacture of this unit, we made every effort to assure it wil l meet all of your expectations. To ensure continuing high performance, read this manual carefully before you connect and operate your hk1680. Warning To prevent fire of shock hazard, do not expose this appliance to rain or moisture. Do not mistake the ferrite loopstick AM antenna for a handle. Its bracket cannot support the unit. Do not place other components or objects on top of the hk1680. Connections For the moment, leave the POWER LINE CORD (53) of the hk1680 unconnected. Put the unit on the shelf or table where it will be installed. Leave enough working space so you can make all connections easily. The hk1680 requires adequate ventilation. It should not be installed on a cushion or rug, and a minimum of two inches (5 cm) clearance should be provided above and behind. Like most stereo equipment, your hk1680 is fitted with pin type RCA connectors to accept standard pin type RCA patch cords. If these are not compatible with your other equipment, consult your audio dealer for patch cords with proper adaptors. Connecting your turntable to the hk1680 Turntables are supplied with their own signal cables. Consult the owner's manual and determine which cable is for the left channel and which is for the right channel. Insert the left channel cable into the left PHONO INPUT connector (44) on your hk1680. Insert the right channel cable into the right PHONO INPUT connector (44). Push the plugs in all the way so they are firmly seated, making good electrical contact. If your turntable has a separate ground wire, connect it to the knurled thumbscrew on the receiver marked GND (42). Connecting your tape decks to the hk1680 To connect a tape deck, connect the left output connector of your tape deck to the left TAPE 1 INPUT connector (46) on your hk1680. Now connect the right output connector of your deck to the right TAPE 1 INPUT connector (46) on your hk1680. Using a second pair of patch cords, connect the left input connector of your deck to the left TAPE 1 OUTPUT connector (47) on your hk1680. Now connect the right input connector of your deck to the right TAPE 1 OUTPUT connector (47) on your hk1680. Push the plugs in all the way so they are firmly seated, making good electrical contact. A second tape deck may be connected similarly using the TAPE 2 INPUT and OUTPUT connectors (48) (49). 3
-
 1
1 -
 2
2 -
 3
3 -
 4
4 -
 5
5 -
 6
6 -
 7
7 -
 8
8
 |
 |
