Harman Kardon TD420 Owners Manual - Page 7
Recording, Using, Feature
 |
View all Harman Kardon TD420 manuals
Add to My Manuals
Save this manual to your list of manuals |
Page 7 highlights
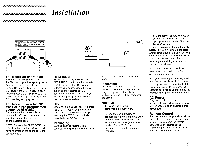
3. If you are recording an FM stereo broadcast using Dolby B or C NR, turn on MPX Filter. Otherwise turn the MPX Filter Off. 4. Press 0. ("REC" will flash on and off on display panel.) 5. Play one of the louder segments of the material to be recorded. 6. Check the signal levels indicated by the bars marked L and R on the display. If levels are constantly unequal, turn the Balance knob left or right to correct the imbalance. 7. Check the Display Panel to determine the tape Type (I, II or IV), and set Input Level accordingly: a. For Types I and II, the loudest material should illuminate the colored bars at +1 or +3dB; b. For type IV, the loudest material should illuminate the bars at +3 or +5dB. 8. Return to the beginning of the material to be recorded. 9. Press 0.- to begin recording. (REC will be continuously displayed.) 10.At end of material to be recorded: a. Press (Stop); or b. Press Rec Mute. This records 4 seconds of silence on the tape and returns the deck to Record. Press • to continue recording. Setting Bias Fine Trim Bias Fine trim enables you to get optimal wideband recordings by adjusting the bias setting for the specific tape you are using. You locate the correct setting by making a test recording, with the Bias Fine trim knob in different positions, as follows: 1. Turn. Dolby NR off. 2. Start with Bias Fine Trim knob at extreme counter-clockwise position. 3. Choose a sound source (CD player, tuner or turntable) and set the Source Selector on your receiver/pre-amp/integrated amplifier accordingly. 4. Play the source material. 5. Load the cassette you are using into the deck, and press - to advance partway onto the tape. 6. Press (Stop) and then • (Record/Pause). 7. Set the Input Level knob so that the signal level meter indicates -3dB. 8. Press Counter Reset. 9. Press ► to begin recording. 10.When the tape counter reaches 00:10, immediately turn the Bias Fine Trim knob clockwise by 1/8 turn. 11. When the tape counter reaches 00:20, again turn the knob clockwise again by the same amount. 12.Continue turning the knob by the same amount at 10-second intervals until the extreme clockwise position is reached. 13.Press (Stop) and rewind the tape to 00:00 on the Counter. 14.Select Tape Monitor on your receiver/pre-amp/integrated amplifier. Turn up the volume to a high level (or use headphones). 15. Press 16.Compare the sound on the tape to the sound from the original source by pressing the Tape Monitor switch on your receiver/pre-amp/integrated amp in and out. Find the place on the tape where the sound is most similar to the original sound. 17. Note the reading on the Tape Counter. This will tell you which Bias Fine Trim setting produces the best sound for the tape you are using. 18.Make a note of the correct setting for this brand and formulation of tape. To find the ideal setting for other tape brands of formulations, repeat this test. Recording Using the CD Sync Feature To use the CD Sync feature first be sure that th TD 420 is correctly connected through it's rear panel remote out jacks to the remote in jacks on a Harman Kardon CD player (refer to page 7). Once connected, the cassett deck will control the PLAY, PAUSE, and STOP functions of your Harman Kardon CD player. To activate the CD Sync function press the CD Sync button on the front panel of the TD 420. The green LED will illuminate. NOTE: Anytime the STOP button on the cassette deck is pressed the Sync function will turn off automatically. 6
-
 1
1 -
 2
2 -
 3
3 -
 4
4 -
 5
5 -
 6
6 -
 7
7 -
 8
8 -
 9
9 -
 10
10 -
 11
11
 |
 |