Hayward HCF7030C HCF Series Cartridge Filter Operation Manual ISC7031HCF - Page 11
Winterizing Filter, Manual Air Relief Valve
 |
View all Hayward HCF7030C manuals
Add to My Manuals
Save this manual to your list of manuals |
Page 11 highlights
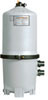
Manual Air Relief Valve / WINTERIZING FILTER 7. Manual Air Relief Valve 7.1 Removing the Manual Air Relief Valve WARNING This product should be installed and serviced only by a qualified pool professional. Your Filter comes with a Manual Air Relief Valve (MAR) pre-installed from the factory. For Qualified pool professionals only: If MAR valve needs to be serviced, follow these instructions carefully. 1. Turn off all system circulation pumps and all electric power on the equipment pad. 2. Set all system valves in a position to prevent from flowing to the filter. Figure 10 water 3. The manual air relief valve must be placed in MANUAL AIR RELIEF SHOWN OPEN IN LOCKED POSITON the OPEN position. Rotate counterclockwise to UNLOCK 4. Wait until all water leakage has stopped. 5. Grasp the MAR body at the flats, turn the MAR counterclockwise until the indicator on the on the MAR flange is aligned with the "UNLOCK" position on the upper filter body. 6. Pull straight up to remove the MAR, a slight rocking motion may help. 7.2 Re-Installation of the Manual Air Relief Valve This product should be installed and serviced only by a qualified pool professional. 1. Check the o-ring seals, replace as needed. 2. With a clean cloth, wipe upper filter body and o-ring groove. Remove all dirt and debris. 3. Align the notch in the MAR Flange with notch on top of the upper filter body. 4. Press the MAR straight down into the upper filter body. 5. Turn the MAR clockwise until the indicator is aligned with the "LOCK" position on the upper filter body. 6. Verify the MAR discharge points away from all electrical connections. 8. Winterizing Filter WARNING This product should be installed and serviced only by a qualified pool professional. In areas where subfreezing temperatures can be expected, the filter should be drained to protect the filter from damage. 1. The filter should be disassembled and the filter cartridges elements cleaned or replaced. 2. Follow directions under FILTER DISASSEMBLY INSTRUCTIONS 3. Then follow REMOVING CARTRIDGES per instructions 4. Reassemble per FILTER RE-ASSEMBLY INSTRUCTIONS. 5. Be sure to leave the drain plug unattached during the winter season to avoid cracking the filter body. 11
-
 1
1 -
2
-
3
-
4
-
5
-
 6
6 -
 7
7 -
 8
8 -
 9
9 -
 10
10 -
 11
11 -
 12
12 -
 13
13 -
 14
14 -
 15
15 -
 16
16
 |
 |
