Hayward Max-Flo XL Max-Flo XL Manual - Page 6
General Information, Installation and Wiring - 1 5 hp
 |
View all Hayward Max-Flo XL manuals
Add to My Manuals
Save this manual to your list of manuals |
Page 6 highlights
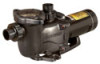
2. General Information 2.1. Introduction This manual contains information for the proper installation and operation of the Hayward Max-Flo XL Series. The instructions in this manual MUST be followed precisely. Failure to install according to defined instructions will void warranty. 2.2. Primary Features Aligns with the original Max-Flo pump for seamless retrofit installations. Advanced hydraulics for increased efficiency and priming ability. All models include 1 1/2" x 2" union connections. See-through strainer cover lets you see when the basket needs cleaning and seals with less than a quarter turn. Pressure testable to 50 psi maximum. Optional riser base available to align with Sta-Rite® Dyna-Pro®. Self-priming (suction lift up to 8' above water level) 2.3. Product Dimensions Single Speed HP Dim "A" 0.75 10.8" 1 11.3" 1.5 12.4" 2 12.5" Dual Speed HP Dim "A" 1 12.0" 1.5 12.5" 2 13.0" 3. Installation and Wiring WARNING - This product should be installed and serviced only by a qualified professional. 3.1. Pump Location Locate pump as close to pool as practical and run suction lines as direct as possible to reduce friction loss. Pump height location should be as close to pool water level as possible and NOT to exceed 8 feet. Suction lines should have continuous slope upward from lowest point in line. Joints must be tight (but not over-tightened). Suction line diameter must equal or be larger than the discharge line diameter. Page 6 of 20 USE ONLY HAYWARD GENUINE REPLACEMENT PARTS Max-Flo XL Pump IS2300 Rev-A1
-
 1
1 -
 2
2 -
 3
3 -
 4
4 -
 5
5 -
 6
6 -
 7
7 -
 8
8 -
 9
9 -
 10
10 -
 11
11 -
 12
12 -
13
-
14
-
15
-
16
-
17
-
18
-
19
-
20
 |
 |
