HealthRider Health Rider Hr2 English Manual
HealthRider Health Rider Hr2 Manual
 |
View all HealthRider Health Rider Hr2 manuals
Add to My Manuals
Save this manual to your list of manuals |
HealthRider Health Rider Hr2 manual content summary:
- HealthRider Health Rider Hr2 | English Manual - Page 1
EXERCISER 10 MAINTENANCE AND TROUBLESHOOTING 12 EXERCISE GUIDELINES 13 PART LIST 14 EXPLODED DRAWING 15 ORDERING REPLACEMENT PARTS of this manual and request a free replacement decal. Apply the decal in the location shown. Note: The decal(s) may not be shown at actual size. HEALTHRIDER is a - HealthRider Health Rider Hr2 | English Manual - Page 2
all important precautions and instructions in this manual and all warnings on your exerciser before using your exerciser. ICON assumes no pre-existing health problems. 7. Wear appropriate clothes while exercising; do not wear loose clothes that could become caught on the exerciser. Always wear - HealthRider Health Rider Hr2 | English Manual - Page 3
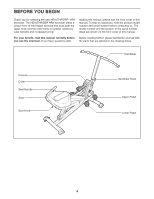
. The HEALTHRIDER HR2 exerciser offers a unique form of low-impact exercise that uses both the upper body and the lower body for greater cardiovascular benefits and increased toning. reading this manual, please see the front cover of this manual. To help us assist you, note the product model number - HealthRider Health Rider Hr2 | English Manual - Page 4
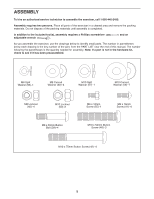
adjustable wrench . and an As you assemble the exerciser, use the drawings below to identify small parts. The number in parentheses below each drawing is the key number of the part, from the PART LIST near the end of this manual. The number following the parentheses is the quantity needed - HealthRider Health Rider Hr2 | English Manual - Page 5
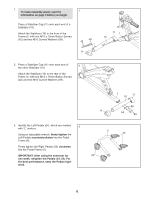
the Left Pedals counterclockwise into the Pedal Frame (5). Firmly tighten the Right Pedals (25) clockwise into the Pedal Frame (5). IMPORTANT: After using the exerciser for one week, retighten the Pedals (24, 25). For the best performance, keep the Pedals tightened. 1 11 10 59 11 59 42 - HealthRider Health Rider Hr2 | English Manual - Page 6
4. Have a second person hold the Pedal Frame 4 (5) in the position shown. 48 Attach the Pedal Frame (5) to the Pivot Frame (6) with an M10 x 54mm Button Screw (48), an M10 Split Washer (57), and an M10 Curved Washer (59). Do not tighten the Button Screw yet. 6 48 59 Then, attach the Pedal - HealthRider Health Rider Hr2 | English Manual - Page 7
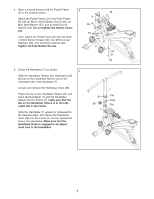
6. Orient the Seat (8) and the Seat Carriage (3) as shown. 6 Attach the Seat (8) to the Seat Carriage (3) with four M6 x 16mm Screws (41). Note: The Screws may be preattached to the underside of the Seat. 7. Orient a Seat Handle (9) as shown. 7 Attach the Seat Handle (9) to the Seat Carriage - HealthRider Health Rider Hr2 | English Manual - Page 8
on the back of the Console. Then, reinsert the Console into the Upper Console Shroud. 12 Reed Switch Wire 13 10. Make sure that all parts are properly tightened. To protect the floor or carpet from damage, place a mat beneath the - HealthRider Health Rider Hr2 | English Manual - Page 9
adjust- ment collar. Seat Upper Pedals Lower Pedals To begin exercising, pull the handlebar toward your waist while pushing the pedals away keep your back straight; do not arch your back. Do no operate the exerciser without the cylinder shields in place. To focus on the muscles of the upper - HealthRider Health Rider Hr2 | English Manual - Page 10
OF THE CONSOLE HOW TO OPERATE THE CONSOLE 1. Turn on the power. Arrow To turn on the power, press the console button or simply begin exercising. 2. Select the desired mode. To select the Time, Reps/Min, Count, or Calories mode, press the console button repeatedly until an arrow points to the - HealthRider Health Rider Hr2 | English Manual - Page 11
MAINTENANCE AND TROUBLESHOOTING Inspect and tighten all parts of the exerciser regularly. Replace any worn parts immediately. To clean the exerciser, use a damp cloth and a small amount of mild soap. IMPORTANT: To prevent damage to the console, keep liquid away from the console and keep the - HealthRider Health Rider Hr2 | English Manual - Page 12
exercising at the proper intensity is the key to achieving results. You can use your heart rate as a guide post-exercise problems. EXERCISE FREQUENCY exercise, you may complete up to five workouts each week, if desired. Remember, the key to success is to make exercise a regular and enjoyable part - HealthRider Health Rider Hr2 | English Manual - Page 13
PART LIST-Model No. HRCR4896.1 R0410A Key No. Qty. Description Key No. Qty. Description 1 1 Frame 2 1 Seat Frame 3 1 Seat Shoulder Bolt 66 2 Nylon Washer 67 2 9mm Pivot Spacer * - Userʼs Manual * - Assembly Tool Note: Specifications are subject to change without notice. For - HealthRider Health Rider Hr2 | English Manual - Page 14
EXPLODED DRAWING-Model No. HRCR4896.1 R0410A 30 12 8 35 35 36 54 13 30 7 34 30 14 15 43 54 30 28 58 51 48 6 58 37 54 27 27 - HealthRider Health Rider Hr2 | English Manual - Page 15
) • the key number and description of the replacement part(s) (see the PART LIST and the EXPLODED DRAWING near the end of this manual) LIMITED WARRANTY IMPORTANT: You must register this product within 30 days of the purchase date to avoid added fees for service needed under warranty. Go to www
-
 1
1 -
 2
2 -
 3
3 -
 4
4 -
 5
5 -
 6
6 -
 7
7 -
8
-
9
-
10
-
11
-
12
-
13
-
14
-
15
 |
 |
2
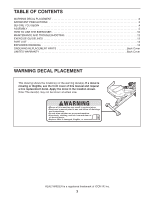
TABLE OF CONTENTS
WARNING DECAL PLACEMENT
..............................................................
2
IMPORTANT PRECAUTIONS
................................................................
3
BEFORE YOU BEGIN
......................................................................
4
ASSEMBLY
...............................................................................
5
HOW TO USE THE EXERCISER
.............................................................
10
MAINTENANCE AND TROUBLESHOOTING
...................................................
12
EXERCISE GUIDELINES
...................................................................
13
PART LIST
..............................................................................
14
EXPLODED DRAWING
....................................................................
15
ORDERING REPLACEMENT PARTS
..................................................
Back Cover
LIMITED WARRANTY
..............................................................
Back Cover
HEALTHRIDER is a registered trademark of ICON IP, Inc.
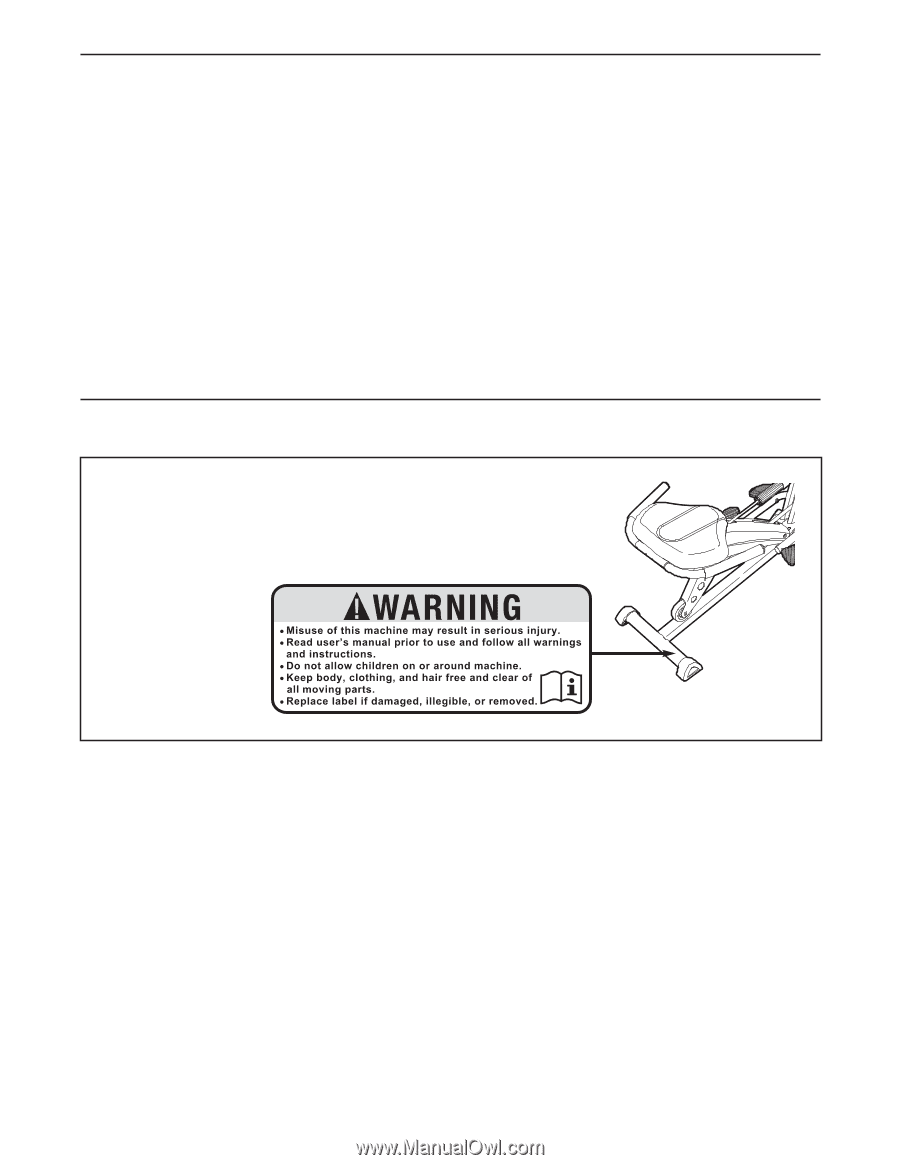
WARNING DECAL PLACEMENT
This drawing shows the location(s) of the warning decal(s).
If a decal is
missing or illegible, see the front cover of this manual and request
a free replacement decal. Apply the decal in the location shown.
Note: The decal(s) may not be shown at actual size.