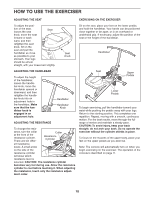
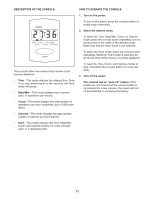
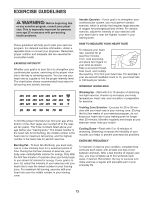
HealthRider Health Rider Hr2 English Manual - Page 7
Slide the Seat Carriage 3 onto the Seat Frame
 |
View all HealthRider Health Rider Hr2 manuals
Add to My Manuals
Save this manual to your list of manuals |
Page 7 highlights
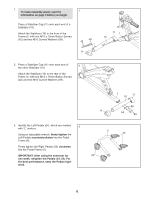
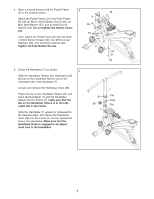
6. Orient the Seat (8) and the Seat Carriage (3) as shown. 6 Attach the Seat (8) to the Seat Carriage (3) with four M6 x 16mm Screws (41). Note: The Screws may be preattached to the underside of the Seat. 7. Orient a Seat Handle (9) as shown. 7 Attach the Seat Handle (9) to the Seat Carriage (3) with two M8 x 40mm Button Bolts (39), two M8 Curved Washers (60), and two M8 Locknuts (40). Attach the other Seat Handle (9) in the same way. 8. Loosen the Seat Knob (29). 8 Slide the Seat Carriage (3) onto the Seat Frame (2). Attach the Seat Carriage with an M6 x 10mm Screw (55) and an M6 Split Washer (56). Slide the Seat Carriage (3) forward or backward to the desired position, and retighten the Seat Knob (29). 8 3 41 41 9 3 60 60 39 9 40 2 3 29 56 55 8
-
 1
1 -
 2
2 -
 3
3 -
 4
4 -
 5
5 -
 6
6 -
 7
7 -
 8
8 -
 9
9 -
 10
10 -
 11
11 -
 12
12 -
13
-
14
-
15
 |
 |
