HealthRider R60 Treadmill Canadian English Manual
HealthRider R60 Treadmill Manual
 |
View all HealthRider R60 Treadmill manuals
Add to My Manuals
Save this manual to your list of manuals |
HealthRider R60 Treadmill manual content summary:
- HealthRider R60 Treadmill | Canadian English Manual - Page 1
questions, or if there are missing parts, please call: 1-888-936-4266 Mon.-Fri. 8h00 until 18h30 EST (excluding holidays). CAUTION Read all precautions and instructions in this manual before using this equipment. Save this manual for future reference. USER'S MANUAL Visit our website at www.proform - HealthRider R60 Treadmill | Canadian English Manual - Page 2
HOW TO FOLD AND MOVE THE TREADMILL 24 TROUBLESHOOTING 26 EXERCISE GUIDELINES 28 PART LIST 29 HOW TO ORDER REPLACEMENT PARTS 31 LIMITED WARRANTY Back Cover Note: An EXPLODED DRAWING is attached in the center of this manual. HealthRider is a registered trademark of ICON Health & Fitness, Inc. 2 - HealthRider R60 Treadmill | Canadian English Manual - Page 3
properly. (See BEFORE YOU BEGIN on page 5 if the treadmill is not working properly.) 14. Never start the treadmill while you are standing on the walking belt. Always hold the handrails while using the treadmill. 15. The treadmill is capable of high speeds. Adjust the speed in small increments - HealthRider R60 Treadmill | Canadian English Manual - Page 4
remove the motor hood unless instructed to do so by an authorized service representative. Servicing other than the procedures in this manual should be performed by an authorized service representative only. 26. The treadmill is intended for in-home use only. Do not use the treadmill in any - HealthRider R60 Treadmill | Canadian English Manual - Page 5
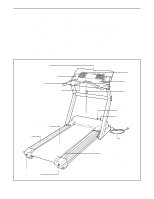
attached to the treadmill (see the front cover of this manual for the location). Before reading further, please familiarize yourself with the parts that are labeled in the drawing below. Book Holder Water Bottle Holder* Handrail Handgrip Pulse Sensor Fans Console Key/Clip Walking Belt Foot Rail - HealthRider R60 Treadmill | Canadian English Manual - Page 6
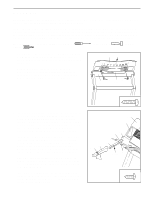
of the packing materials until the treadmill is assembled. Note: The underside of the treadmill walking belt is coated with high-performance lubricant. in the Handrail Extension with the holes in the post. If necessary, use a rubber mallet to fully insert the Handrail Extension. Attach the Handrail - HealthRider R60 Treadmill | Canadian English Manual - Page 7
72 40 67 5 105 Small Holes 55 105 4. Make sure that all parts are properly tightened before you use the treadmill. Place a mat beneath the treadmill to protect the floor or carpet. For your benefit, we recommend that you familiarize yourself with the TROUBLESHOOTING section on pages 26 and 27. 7 - HealthRider R60 Treadmill | Canadian English Manual - Page 8
If you purchase the optional chest pulse sensor (see page 23), follow the steps below to install the receiver and the short jumper wire included with the chest pulse sensor. 1. Make sure that the power cord is unplugged. Remove the indicated 3/4" Screws (40) from the Console Back (117). 1 Remove - HealthRider R60 Treadmill | Canadian English Manual - Page 9
to indicate whether it is functioning properly. Failure to use a properly functioning surge suppressor could result in damage to the control system of the treadmill. If the control system is damaged, the walking belt may change speed or stop unexpectedly, which may result in a fall and serious - HealthRider R60 Treadmill | Canadian English Manual - Page 10
stereo, computer, or VCR and play special iFIT.com CD and video programs (iFIT.com CDs and videocassettes are available separately). iFIT.com CD and video programs automatically control the speed and incline of the treadmill as a personal trainer guides you through every step of your workout. High - HealthRider R60 Treadmill | Canadian English Manual - Page 11
For simplicity, all instructions in this section refer to miles. To stop the walking belt, press the Stop button. The Time/Segment Time/Pace display will begin to flash. To restart the walking belt, press the Start button or the Speed v button. Note: The first time the treadmill is used, observe the - HealthRider R60 Treadmill | Canadian English Manual - Page 12
the next every few seconds. Note: Each time the incline changes, the display will show the current incline setting for several seconds. Speed display-This display shows the speed of the walking belt. 6 Measure your heart rate if desired. To use the handgrip pulse sensor, first make sure that your - HealthRider R60 Treadmill | Canadian English Manual - Page 13
the Time/Segment Time/Pace display counts down to zero. The walking belt will then slow to a stop. If the speed or incline setting is too high or too low during the program, you can manually override the setting by pressing the Speed or Incline buttons. Every few times a Speed button is pressed, an - HealthRider R60 Treadmill | Canadian English Manual - Page 14
if desired. See step 7 on page 12. 7 When the program is finished, remove the key from the console. When the program has ended, make sure that the incline of the treadmill is at the lowest setting. Next, remove the key from the console and put it in a safe place.Note: If the displays and - HealthRider R60 Treadmill | Canadian English Manual - Page 15
program will continue until no time remains in the program. The walking belt will then slow to a stop. If the speed or incline setting is too high or too low during the program, you can adjust the setting with the Speed or Incline buttons. However, each time the console compares your heart rate to - HealthRider R60 Treadmill | Canadian English Manual - Page 16
When the key is inserted, the manual mode will USE CUSTOM PROGRAMS on page 17. 3 Press the Start button or the Speed v button and program the desired speed and incline settings. A moment after the button is pressed, the walking belt the Stop button twice. The speed and incline settings - HealthRider R60 Treadmill | Canadian English Manual - Page 17
treadmill will automatically adjust to the second speed and incline settings that you programmed previously. The program will continue in this way until the speed setting for the last segment is shown in the Current Segment column and the last segment ends. The walking belt will then slow to a stop - HealthRider R60 Treadmill | Canadian English Manual - Page 18
with CD player. See pages 18 and 19 for connecting instructions. To use iFIT.com videocassettes, the treadmill must be connected to your VCR. See page 20 for connecting instructions. To use iFIT.com programs directly from our Web site, the treadmill must be connected to your home computer. See page - HealthRider R60 Treadmill | Canadian English Manual - Page 19
If the LINE OUT jack is being used, see instruction B. Note: If your computer has a 3.5mm LINE OUT jack, see instruction A. If your computer has only a PHONES jack, see instruction B. A. Plug one end of the audio cable into the jack on the front of the treadmill near the power cord. Plug the other - HealthRider R60 Treadmill | Canadian English Manual - Page 20
1-888-936-4266. Follow the steps below to use an iFIT.com CD or video program. 1 Insert the key into the console. See HOW TO TURN ON THE POWER on page 11. 2 Select the iFIT.com mode. When the key is inserted, the manual mode will be selected. To use iFIT.com CDs or videocassettes, press the Program - HealthRider R60 Treadmill | Canadian English Manual - Page 21
program is completed, the walking belt will stop and the Time/Segment Time/Pace display will begin to flash. Note: To use another CD or video program, press the Stop button or remove the key and go to step 1 on page 20. Note: If the speed or incline of the treadmill does not change when a "chirp - HealthRider R60 Treadmill | Canadian English Manual - Page 22
is completed, the walking belt will stop and the Time/Segment Time/Pace display will begin to flash. Note: To use another program, press the Stop button and go to step 5. Note: If the speed or incline of the treadmill does not change when a "chirp" is heard, make sure that the iFIT.com indicator is - HealthRider R60 Treadmill | Canadian English Manual - Page 23
information mode, hold down the Stop button while inserting the key into the console. When the information mode is selected, the following information will be shown: The Time/Segment Time/ Pace display will show the total number of hours the treadmill has been used. THE OPTIONAL CHEST PULSE SENSOR - HealthRider R60 Treadmill | Canadian English Manual - Page 24
your legs and keep your back straight. As you raise the treadmill, make sure to lift with your legs rather than your back. Raise the treadmill about halfway to the vertical position. 2. Hold the treadmill firmly with your left hand. Using your right hand, pull the latch knob to the right and hold - HealthRider R60 Treadmill | Canadian English Manual - Page 25
LOWER THE TREADMILL FOR USE 1. Hold the treadmill firmly with your left hand. Pull the latch knob to the right. Pivot the treadmill down until the pin on the latch knob is below the foam grip. Slowly release the latch knob. 2. Hold the treadmill firmly with both hands, and lower the treadmill to the - HealthRider R60 Treadmill | Canadian English Manual - Page 26
all of the specifications described on page 9. b. If the walking belt is overtightened, treadmill performance may decrease and the b 7-10cm walking belt may be permanently dam- aged. Remove the key and UNPLUG THE POWER CORD. Using the included allen wrench, turn both rear roller adjustment - HealthRider R60 Treadmill | Canadian English Manual - Page 27
careful not to overtighten the walking belt. Plug in the power cord, insert the key and run the treadmill for a few minutes. Repeat until the walking belt is centered. b. If the walking belt slips when walked on, b first remove the key and UNPLUG THE POWER CORD. Using the allen wrench, turn - HealthRider R60 Treadmill | Canadian English Manual - Page 28
or individuals with preexisting health problems. The pulse sensors are not medical devices. Various factors, including the user's movement, may affect your body begin to use stored fat calories for energy. If your goal is to burn fat, adjust the speed or incline of the treadmill until your heart rate - HealthRider R60 Treadmill | Canadian English Manual - Page 29
parts listed below, see the EXPLODED DRAWING attached in the center of this manual. Key No. Qty. Description Key Platform Walking Platform Screw Walking Belt Key Clip Foot Screw Upright Wire Harness Shock Large Upright Endcap Upright Base Cap Filter Wire Latch Warning Decal Incline Motor Motor - HealthRider R60 Treadmill | Canadian English Manual - Page 30
Hand Pulse Wire Incline Bracket Incline Motor Bolt (Bottom) Left Cup Holder Motor Isolator Plate Optional Chest Pulse Optional iFit.com CD 4" Blue Wire, 2 F 8" Green Wire, 2 Ring 4" Black Wire, 2 F 26" White Wire, 2 F User's Manual # These parts are not illustrated * Includes all parts shown in the - HealthRider R60 Treadmill | Canadian English Manual - Page 31
: • The MODEL NUMBER of the product (HCTL07120) • The NAME of the product (HealthRider® R60 treadmill) • The SERIAL NUMBER of the product (see the front cover of this manual) • The KEY NUMBER and DESCRIPTION of the part(s) (see the PART LIST on pages 29 and 30) ICON OF/DU CANADA, INC. 900 de - HealthRider R60 Treadmill | Canadian English Manual - Page 32
? ❏ Sports ❏ Fitness ❏ Motoring ❏ Business ❏ Computer ❏ General 12) Do you wish to be sent further bulletins about ICON products? ❏ Yes ❏ No THANK YOU FOR YOUR TIME © 2003 ICON of Canada, Inc. HealthRider® is a registered trademark of ICON Health & Fitness, Inc. Part No. 187868 R0803A - HealthRider R60 Treadmill | Canadian English Manual - Page 33
1 40 21 58 57 4 40 30 96 66 84 56 108 52 53 40 47 44 28 48 84 40 41 40 To identify the parts shown on this EXPLODED DRAWING, see the PART LIST on pages 29 and 30. R0803A - HealthRider R60 Treadmill | Canadian English Manual - Page 34
61 62 75 129** 87 2 76 2 40 85 40 44 120 40 40 81 40 26 40 2 123 116 40 23 40 20 80 2 87 73 75 65 78 104 76 77 86 13 40 26 43 43 124 88 91 13 125 98 43 73 13 77 13 78 104 98 43 126 40 82 93 40 93 83 119 40 75 44 113 117 44 40 92 107 106 88 114 51 128**
-
 1
1 -
 2
2 -
 3
3 -
 4
4 -
 5
5 -
 6
6 -
 7
7 -
8
-
9
-
10
-
11
-
12
-
13
-
14
-
15
-
16
-
17
-
18
-
19
-
20
-
21
-
22
-
23
-
24
-
25
-
26
-
27
-
28
-
29
-
30
-
31
-
32
-
33
-
34
 |
 |
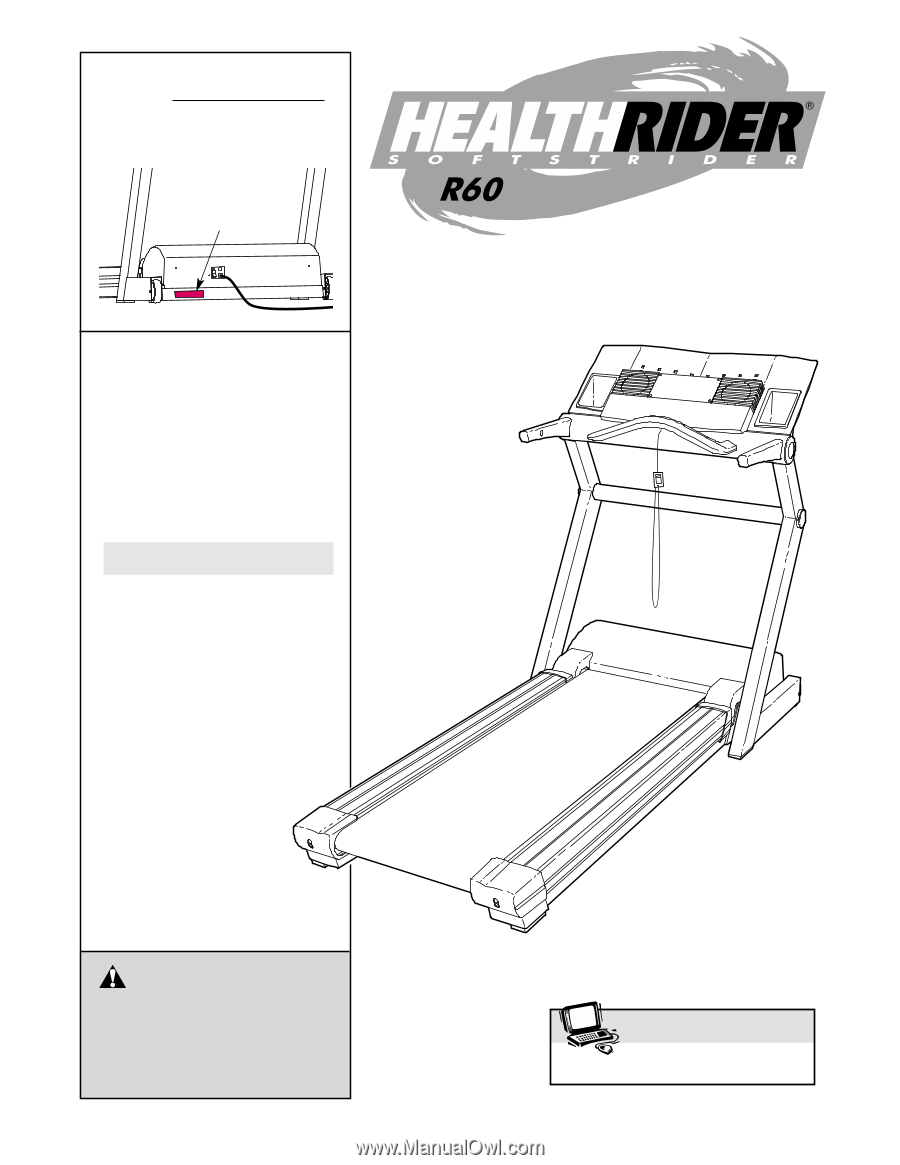
Model No. HCTL07120
Serial No.
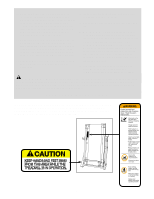
CAUTION
Read all precautions and instruc-
tions in this manual before using
this equipment. Save this man-
ual for future reference.
Write the serial number in the space
above for future reference.
Serial Number
Decal
USER'S
MANUAL
QUESTIONS?
As a manufacturer, we are com-
mitted to providing complete
customer satisfaction. If you
have questions, or if there are
missing parts, please call:
1-888-936-4266
Mon.–Fri. 8h00 until 18h30 EST
(excluding holidays).
www.proform.com
Visit our website at