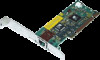
HP 10/100 3Com 3c905C-TX HP 3COM LAN cards (D7522A, D7523A), User Guide - Page 13
Software Installation and Update on a Windows NT 4.0, System - nic driver windows 7
 |
View all HP 10/100 3Com 3c905C-TX manuals
Add to My Manuals
Save this manual to your list of manuals |
Page 13 highlights
HP 10/100 3Com 3C905C-TX Network Interface Card Installation Guide Software Installation Procedure 1 Double-click on the My Computer icon, then double-click on the Control Panel icon. 2 Double-click on the System icon. The System Properties box appears. 3 Click on the Device Manager tab. A list of devices appears, arranged by type. 4 Finally, double-click on Network Adapters. The name of the installed network interface card appears: 3Com EtherLink 10/100 PCI For Complete PC Management NIC (3C905CTX). If this name does not appear or if a yellow exclamation mark appears next to it, follow this troubleshooting procedure: 5 In the Device Manager window, double-click on Other Devices. 6 Click on PCI Ethernet Controller or the duplicate 3C905C-TX NIC entry. 7 Click on Remove. 8 Restart your PC. Checking the Follow these steps to confirm that your network setting are correct Network Settings on a PC running Windows 95 or Windows 98: 1 In the Control Panel window, double-click on the Network icon. 2 Ensure that you have the correct Client and Protocols installed. You may need to contact your MIS manager for this information. 3 Finally, double-click on each of your installed protocols and ensure that your settings are correct for your PC's connection to the LAN. You may need to contact your MIS manager for this information. Software Installation and Update on a Windows NT 4.0 System Windows NT This section describes how to install the network driver in a PC 4.0 Users running Windows NT version 4.0 without the networking components installed. English 13
-
 1
1 -
2
-
3
-
4
-
5
-
6
-
7
-
 8
8 -
 9
9 -
 10
10 -
 11
11 -
 12
12 -
 13
13 -
 14
14 -
 15
15 -
 16
16 -
 17
17 -
 18
18 -
19
-
20
-
21
-
22
-
23
-
24
-
25
-
26
-
27
-
28
-
29
-
30
 |
 |
