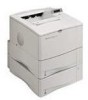
HP 4100dtn HP LaserJet 4100 series printers - Getting Started Guide - Page 30
Installing Macintosh printing software, Chooser, Apple, Apple LaserWriter 8, AppleTalk Zones - printer port
 |
UPC - 725184504853
View all HP 4100dtn manuals
Add to My Manuals
Save this manual to your list of manuals |
Page 30 highlights
English Note Installing Macintosh printing software On a Macintosh-compatible computer, the installation procedures are the same for a network administrator, a network client, and a single user. Install the software on any computer that will be printing to the printer. If the computer is connected to the printer by a LocalTalk (Printer Port) or EtherNet connection, the AppleTalk (or Network) control panel must be configured for the correct connection to communicate with the printer. The Macintosh partition on the CD contains an installer program for each available language. Find the language that is appropriate for your operating system, and then use the installer program for that language. 1 Quit all open applications. 2 Insert the CD into the CD drive. 3 Double-click the Installer icon and follow the instructions on the screen. 4 Open the Chooser from the Apple menu. 5 Click the Apple LaserWriter 8 icon. If the icon is not there, contact your Macintosh dealer. 6 If you are on a network with multiple zones, select the zone in the AppleTalk Zones box where the printer is located. If this is unknown, ask your network administrator. 7 Double-click the desired printer. A Desktop Printer icon should appear. 8 Close the Chooser by clicking the go-away (close) box in the upper-left corner. EN Step 12: Install the printing software 1-29
-
 1
1 -
2
-
3
-
4
-
5
-
6
-
7
-
8
-
9
-
10
-
11
-
12
-
13
-
14
-
15
-
16
-
17
-
18
-
19
-
20
-
21
-
22
-
23
-
24
-
 25
25 -
 26
26 -
 27
27 -
 28
28 -
 29
29 -
 30
30 -
 31
31 -
 32
32 -
 33
33 -
 34
34 -
 35
35 -
36
-
37
-
38
-
39
-
40
-
41
-
42
-
43
-
44
-
45
-
46
-
47
-
48
-
49
-
50
-
51
-
52
-
53
-
54
-
55
-
56
-
57
-
58
-
59
-
60
-
61
-
62
-
63
-
64
-
65
-
66
-
67
-
68
-
69
-
70
-
71
-
72
-
73
-
74
 |
 |
