HP 4400C HP Scanjet 4400C/5400C Series Scanner Windows - (English) User Manual - Page 31
Sending a scan using e-mail
 |
UPC - 725184800566
View all HP 4400C manuals
Add to My Manuals
Save this manual to your list of manuals |
Page 31 highlights
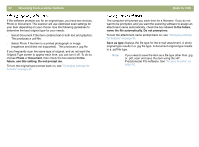
30 Scanning from scanner buttons Sending a scan using e-mail When you send e-mail using the E-mail button ( ), the scanner scans the item using default settings optimized for mailing. If you have a supported e-mail program, the scanned image automatically appears as a file attachment in a new e-mail message, which you then address and send. If your e-mail program is not supported, choose E-mail anyway. The computer prompts you to save the item as a file, and then the scanner completes the scan. Open your e-mail program and attach the file to a message as you normally do. Note: When prompted to save the file, be sure to select the file type you want. Tip To view the scanned item before you send it, open the file attachment from the new e-mail message. Back to TOC Supported e-mail programs allow the scanner to scan an item as a file and attach it to a new e-mail message. If a scanned image automatically appears as a file attachment in a new e-mail message, your e-mail program is supported. If you are using an unsupported e-mail program, such as the Webbased program Microsoft Hotmail®, the scanner cannot scan items directly into an e-mail message. The scanner prompts you to save the item as a file and then scans the item with settings optimized for e-mail. (When prompted to save the file, be sure to select the file type you want.) After saving the image as a file, open an e-mail message and attach the file as you normally do. To be prompted to save the file, make sure that E-mail File is selected as the destination in the button options. See "Changing settings for buttons" on page 34 to check or change which e-mail program is set as the default, or to set E-mail File as the default.
-
 1
1 -
2
-
3
-
4
-
5
-
6
-
7
-
8
-
9
-
10
-
11
-
12
-
13
-
14
-
15
-
16
-
17
-
18
-
19
-
20
-
21
-
22
-
23
-
24
-
25
-
 26
26 -
 27
27 -
 28
28 -
 29
29 -
 30
30 -
 31
31 -
 32
32 -
 33
33 -
 34
34 -
 35
35 -
 36
36 -
37
-
38
-
39
-
40
-
41
-
42
-
43
-
44
-
45
-
46
-
47
-
48
-
49
-
50
-
51
-
52
-
53
-
54
-
55
-
56
-
57
-
58
-
59
-
60
-
61
-
62
-
63
-
64
-
65
-
66
-
67
-
68
-
69
-
70
-
71
-
72
-
73
-
74
-
75
-
76
-
77
-
78
-
79
-
80
-
81
-
82
-
83
-
84
-
85
-
86
-
87
-
88
-
89
-
90
-
91
-
92
-
93
-
94
-
95
-
96
-
97
-
98
-
99
-
100
-
101
-
102
-
103
-
104
-
105
-
106
-
107
-
108
-
109
-
110
-
111
-
112
-
113
-
114
-
115
-
116
-
117
-
118
-
119
-
120
-
121
-
122
-
123
-
124
-
125
-
126
-
127
-
128
-
129
-
130
-
131
-
132
-
133
-
134
-
135
-
136
-
137
-
138
-
139
-
140
-
141
 |
 |