HP 4570C HP Scanjet 4570c and 5500c scanner - (English) Glass Cleaning Manual - Page 5
un-fasten the top cover
 |
UPC - 808736181358
View all HP 4570C manuals
Add to My Manuals
Save this manual to your list of manuals |
Page 5 highlights
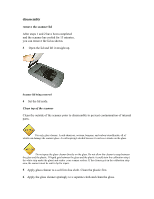
un-fasten the top cover Begin disassembly only after completing steps 1 through 6 You are about to expose the interior of the scanner to the dust of the outside environment. the scanner is very sensitive to dust; any dust particles that get into the carriage head can cause streaks in the scanned image. Minimize the time that the top cover is off by having all the cleaning materials ready. Also be sure to disassemble your scanner in a clean environment. 7 Using a Phillips screwdriver remove the four screws from the bottom of the scanner. See the following illustration for the location of the screws. location of the screws 8 Holding the top and bottom cover together, turn the unit back over so that the glass side is facing up.
-
 1
1 -
 2
2 -
 3
3 -
 4
4 -
 5
5 -
 6
6 -
 7
7 -
 8
8 -
 9
9
 |
 |

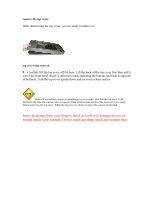
un-fasten the top cover
Begin disassembly only after completing steps 1 through 6
You are about to expose the interior of the scanner to the dust of the outside environment. the
scanner is very sensitive to dust; any dust particles that get into the carriage head can cause streaks in the
scanned image. Minimize the time that the top cover is off by having all the cleaning materials ready. Also
be sure to disassemble your scanner in a clean environment.
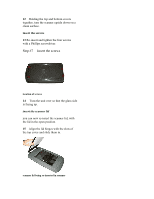
7
Using a Phillips screwdriver remove the four screws from the bottom of the scanner.
See the following illustration for the location of the screws.
location of the screws
8
Holding the top and bottom cover together,
turn the unit back over so that the glass side is
facing up.