HP 515B Maintenance & Service Guide: HP 500B and 505B, Compaq 500B and 505 - Page 35
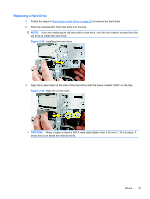
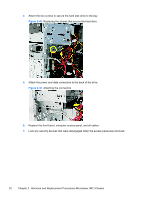
Replacing an Optical Drive, Preparation for Disassembly, on Access Panel, Front Bezel
 |
View all HP 515B manuals
Add to My Manuals
Save this manual to your list of manuals |
Page 35 highlights
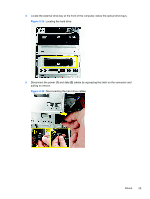
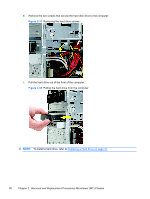
Replacing an Optical Drive To install an optical drive: 1. Prepare the computer for disassembly (Preparation for Disassembly on page 4). 2. Remove the access panel (Access Panel on page 5). 3. Remove the front bezel (Front Bezel on page 7). 4. If the new drive has screws installed on the sides of the drive, remove the screws before inserting the drive into the chassis. 5. Push the replacement disc drive partially into the drive bay in the computer. Figure 2-31 Installing the optical drive 6. Connect the power cable (1) and data cable (2) to the rear of the optical drive. Figure 2-32 Connecting the power and data cables Drives 27
-
 1
1 -
2
-
3
-
4
-
5
-
6
-
7
-
8
-
9
-
10
-
11
-
12
-
13
-
14
-
15
-
16
-
17
-
18
-
19
-
20
-
21
-
22
-
23
-
24
-
25
-
26
-
27
-
28
-
29
-
 30
30 -
 31
31 -
 32
32 -
 33
33 -
 34
34 -
 35
35 -
 36
36 -
 37
37 -
 38
38 -
 39
39 -
 40
40 -
41
-
42
-
43
-
44
-
45
-
46
-
47
-
48
-
49
-
50
-
51
-
52
-
53
-
54
-
55
-
56
-
57
-
58
-
59
-
60
-
61
-
62
-
63
-
64
-
65
-
66
-
67
-
68
-
69
-
70
-
71
-
72
-
73
-
74
-
75
-
76
-
77
-
78
-
79
-
80
-
81
-
82
-
83
-
84
-
85
-
86
-
87
-
88
-
89
-
90
-
91
-
92
-
93
-
94
-
95
-
96
-
97
-
98
-
99
-
100
-
101
-
102
-
103
-
104
-
105
-
106
-
107
-
108
-
109
-
110
-
111
-
112
-
113
 |
 |
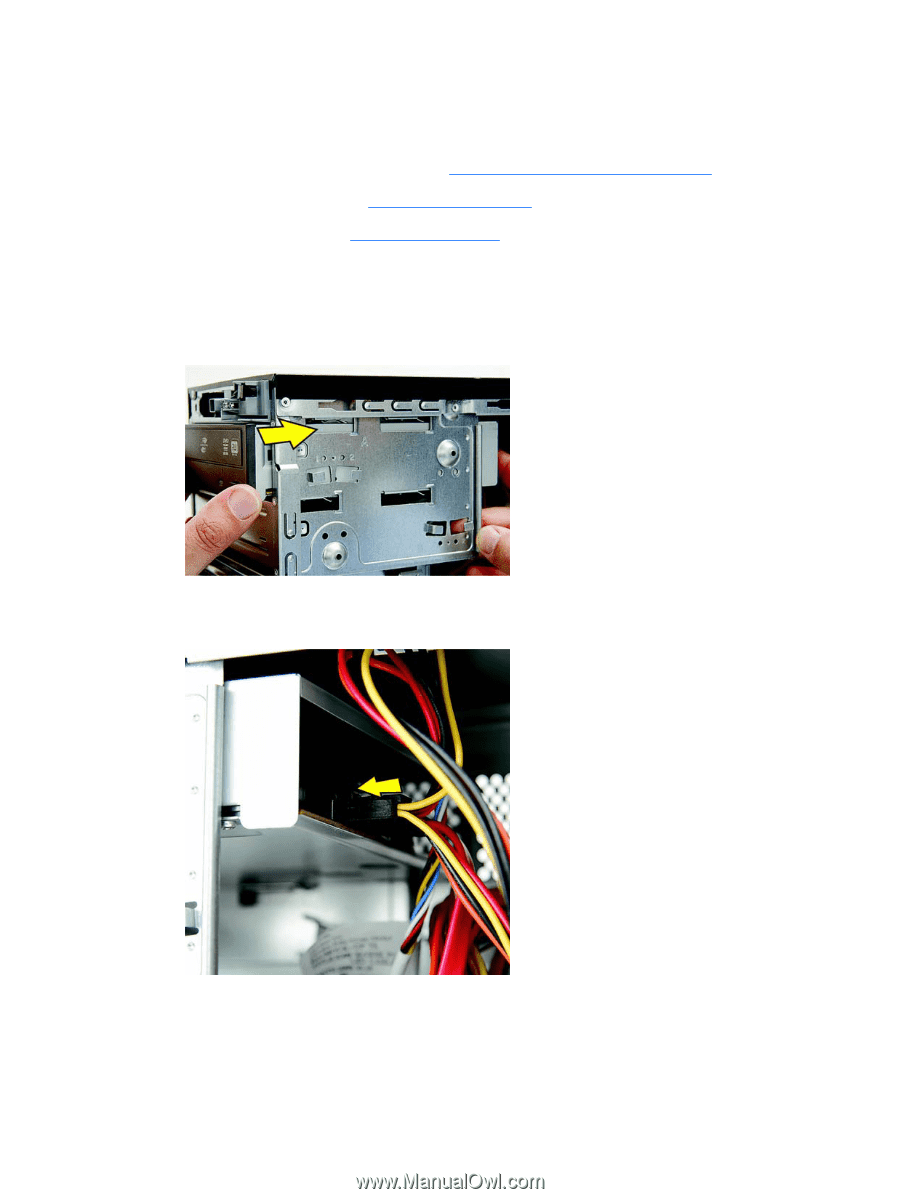
Replacing an Optical Drive
To install an optical drive:
1.
Prepare the computer for disassembly (
Preparation for Disassembly
on page
4
).
2.
Remove the access panel (
Access Panel
on page
5
).
3.
Remove the front bezel (
Front Bezel
on page
7
).
4.
If the new drive has screws installed on the sides of the drive, remove the screws before
inserting the drive into the chassis.
5.
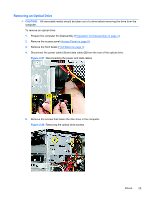
Push the replacement disc drive partially into the drive bay in the computer.
Figure 2-31
Installing the optical drive
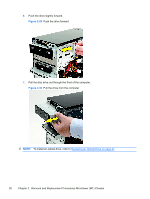
6.
Connect the power cable
(1)
and data cable
(2)
to the rear of the optical drive.
Figure 2-32
Connecting the power and data cables
Drives
27