HP 5400C HP Scanjet 4400C/5400C Series Scanner Windows - (English) Setup and S - Page 10
Performing basic installation troubleshooting, Add/Remove, Programs, Change, Repair - windows 10
 |
View all HP 5400C manuals
Add to My Manuals
Save this manual to your list of manuals |
Page 10 highlights
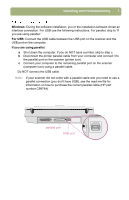
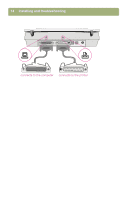
10 Installing and troubleshooting Performing basic installation troubleshooting If the scanner or software is not working, perform these steps first: Check that the power cable is securely connected between the scanner and a live electrical outlet or a surge protector that is turned on. Make sure you have properly and securely connected the scanner to the computer using either the universal serial bus (USB) or the parallel input/output (I/O) interface. See "Using interface connections" on page 12. If the scanner is making a loud grinding noise, make sure the scanner is unlocked. Move the lock to the unlocked position. Disconnect the power cable from the scanner and turn off the computer. After 30 seconds, reconnect the power cable and then turn on the computer, in that order. If you receive installation file errors, or the scanning software will not run, make sure all programs are closed and complete the following steps: a If you have any previous versions of HP scanning software, uninstall that software. (To uninstall the software, follow the instructions that came with the software.) b Double-click the Add/Remove Programs icon. c Select the HP Precisionscan Pro software and click Add/Remove [for Windows 95, Windows 98, Windows Millennium Edition (Me), and Windows NT] or Change (for Windows 2000). d After the welcome screen, double-click the Repair option on the second screen. (Choosing Repair will reinstall the software with the same options you chose the first time.) e Follow the instructions on the screen. f If you still receive installation file errors or the scanning software will not run, uninstall and reinstall the HP scanning software. See "Uninstalling the software" on page 22.
-
 1
1 -
2
-
3
-
4
-
 5
5 -
 6
6 -
 7
7 -
 8
8 -
 9
9 -
 10
10 -
 11
11 -
 12
12 -
 13
13 -
 14
14 -
 15
15 -
16
-
17
-
18
-
19
-
20
-
21
-
22
-
23
-
24
-
25
-
26
-
27
-
28
-
29
-
30
-
31
-
32
-
33
-
34
-
35
-
36
-
37
-
38
-
39
-
40
-
41
-
42
-
43
-
44
 |
 |