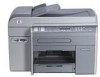
HP 9110 HP Officejet 9100 - Getting Started Guide - Page 46
Solving installation problems - driver
 |
UPC - 829160117492
View all HP 9110 manuals
Add to My Manuals
Save this manual to your list of manuals |
Page 46 highlights
English Solving installation problems This section provides troubleshooting suggestions for some of the most common issues associated with hardware and software installation. See the following for additional information about installation problems: For late-breaking information, see the readme file and release notes on the Starter CD for your operating system. For network installation problems, see the HP Jetdirect Administrator's Guide on the Starter CD for your operating system. Hardware installation suggestions Check the all-in-one Make sure that all packing tape and material have been removed from outside and inside the all-in-one. Make sure that the all-in-one is loaded with paper. Make sure the scanner lock (located on the underside of the print-carriage access door) has been moved to the unlocked position. Make sure that no lights are on or blinking except the Ready light, which should be on. If the Attention light is blinking, check for messages on the control panel. See the onscreen user's guide for explanations of messages. Make sure that the all-in-one can print a Configuration page. See the onscreen user's guide on the Starter CD for your operating system for more information. If the network does not have a DHCP server, manually set the IP address for the all-in-one. See the onscreen user's guide on the Starter CD for your operating system for more information. Check the hardware connections Make sure that any cords and cables that you are using are in good working order. Make sure that the power cord is connected securely to both the all-in-one and to a working power outlet. Make sure that the phone cord is connected to the (line-in) port. Check the printheads and ink cartridges Make sure that you have removed the tape from the printheads. Make sure that all of the printheads and ink cartridges are firmly installed in their correct, color-coded slot. Press down firmly on each one to ensure proper contact. The all-in-one cannot work if they are not all installed. Make sure that the printhead latch is closed properly. If the control-panel display shows a printhead error message, clean the contacts on the printheads. See the onscreen user's guide on the Starter CD for your operating system for more information. Software installation suggestions Check the computer system Make sure that your computer is running one of the supported operating systems (see the onscreen user's guide on the Starter CD for your operating system for more information). Make sure that the computer meets at least the minimum system requirements (see the onscreen user's guide on the Starter CD for your operating system for more information). Verify installation preliminaries Make sure to use the Starter CD that contains the correct installation software for your operating system. Before installing software on a Windows computer, make sure that all other programs are closed. If the computer does not recognize the path to the CD-ROM drive that you type, make sure that you are specifying the correct drive letter. Make sure you are installing the software from the computer's local CD-ROM drive. Installation of the software from a shared CD-ROM drive is not supported. If the computer cannot recognize the Starter CD in the CD-ROM drive, inspect the Starter CD for damage. You can download the printer driver from http://www.hp.com/support/officejet9100. Follow the recommended steps If your computer is running a Windows operating system, HP recommends that you install the all-in-one software first. Connect the USB cable or parallel cable only when prompted by the software. 45
-
 1
1 -
2
-
3
-
4
-
5
-
6
-
7
-
8
-
9
-
10
-
11
-
12
-
13
-
14
-
15
-
16
-
17
-
18
-
19
-
20
-
21
-
22
-
23
-
24
-
25
-
26
-
27
-
28
-
29
-
30
-
31
-
32
-
33
-
34
-
35
-
36
-
37
-
38
-
39
-
40
-
 41
41 -
 42
42 -
 43
43 -
 44
44 -
 45
45 -
 46
46 -
 47
47 -
 48
48 -
 49
49 -
 50
50 -
 51
51 -
52
-
53
-
54
-
55
-
56
-
57
-
58
-
59
-
60
-
61
-
62
-
63
-
64
-
65
-
66
-
67
-
68
-
69
-
70
-
71
-
72
-
73
-
74
-
75
-
76
-
77
-
78
-
79
-
80
-
81
-
82
-
83
-
84
-
85
-
86
-
87
-
88
-
89
-
90
-
91
-
92
 |
 |
