HP A6419fh Getting Started Guide - Page 159
Making a paper disc label, Back of Front Cover
 |
UPC - 883585760572
View all HP A6419fh manuals
Add to My Manuals
Save this manual to your list of manuals |
Page 159 highlights
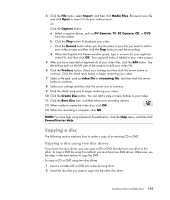
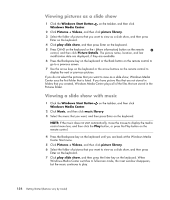
11 When you are ready to create the LightScribe label, click the Print icon. 12 Click OK to create the LightScribe label. The estimated time to complete the label displays, along with a progress bar. It is possible to continue to work on the computer while the LightScribe label is created. For more help using CyberLink LabelPrint, click the Help icon to open the Help information. Making a paper disc label The following section provides instructions for creating a paper label for the disc. To create a LightScribe label, refer to "Making a disc label using LightScribe Technology." 1 Load the printer with adhesive label paper. You can purchase label paper at most office-supply stores. 2 Click the Windows Start Button on the taskbar, All Programs, and then click CyberLink DVD Suite. 3 Click the icon in the lower-right corner of the window to open a list of CyberLink programs, and then click LabelPrint. 4 Under Step 1: Select the type of label you want to print, select one of following: Front Cover (paper insert label) Back of Front Cover (paper insert label) Disc Inlay (paper insert label) 5 Click the arrow button at the bottom of the window to continue. 6 Under Step 2: Edit titles and other information, design the disc label: a Type in a disc title, author, and date. b Type in song titles, artist/author, and time/size of the files. c Click the Import icon to import MP3 information. Creating Audio and Data Discs 149
-
 1
1 -
2
-
3
-
4
-
5
-
6
-
7
-
8
-
9
-
10
-
11
-
12
-
13
-
14
-
15
-
16
-
17
-
18
-
19
-
20
-
21
-
22
-
23
-
24
-
25
-
26
-
27
-
28
-
29
-
30
-
31
-
32
-
33
-
34
-
35
-
36
-
37
-
38
-
39
-
40
-
41
-
42
-
43
-
44
-
45
-
46
-
47
-
48
-
49
-
50
-
51
-
52
-
53
-
54
-
55
-
56
-
57
-
58
-
59
-
60
-
61
-
62
-
63
-
64
-
65
-
66
-
67
-
68
-
69
-
70
-
71
-
72
-
73
-
74
-
75
-
76
-
77
-
78
-
79
-
80
-
81
-
82
-
83
-
84
-
85
-
86
-
87
-
88
-
89
-
90
-
91
-
92
-
93
-
94
-
95
-
96
-
97
-
98
-
99
-
100
-
101
-
102
-
103
-
104
-
105
-
106
-
107
-
108
-
109
-
110
-
111
-
112
-
113
-
114
-
115
-
116
-
117
-
118
-
119
-
120
-
121
-
122
-
123
-
124
-
125
-
126
-
127
-
128
-
129
-
130
-
131
-
132
-
133
-
134
-
135
-
136
-
137
-
138
-
139
-
140
-
141
-
142
-
143
-
144
-
145
-
146
-
147
-
148
-
149
-
150
-
151
-
152
-
153
-
 154
154 -
 155
155 -
 156
156 -
 157
157 -
 158
158 -
 159
159 -
 160
160 -
 161
161 -
 162
162 -
 163
163 -
 164
164 -
165
-
166
-
167
-
168
-
169
-
170
-
171
-
172
-
173
-
174
-
175
-
176
-
177
-
178
-
179
-
180
-
181
-
182
-
183
-
184
-
185
-
186
-
187
-
188
-
189
-
190
-
191
-
192
-
193
-
194
-
195
-
196
-
197
-
198
-
199
-
200
-
201
-
202
-
203
-
204
-
205
-
206
-
207
-
208
-
209
-
210
-
211
-
212
-
213
-
214
-
215
-
216
 |
 |
