HP All-in-One 200-5150t Upgrading and Servicing Guide - Page 16
Installing a New Hard Disk Drive, placed at the notched side of the cage.
 |
View all HP All-in-One 200-5150t manuals
Add to My Manuals
Save this manual to your list of manuals |
Page 16 highlights
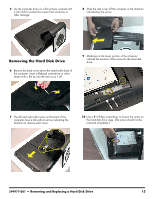
11 Grasp the metal handle on the hard disk drive cage to slide the cage in the direction indicated by the arrow on the cage. 14 Slide the hard disk drive out of the cage. 12 Lift out the hard disk drive. 13 To remove the hard disk drive from the cage, unscrew the four screws on the cage using a #2 Phillips screw driver. Installing a New Hard Disk Drive NOTE: The replacement hard drive may not look exactly the same as the original drive due to different manufacturers or models. Hewlett-Packard always provides quality parts that meet or exceed your original computer specifications. 1 Align the hard disk drive so the connectors will be placed at the notched side of the cage. 14 599977-001 - Removing and Replacing a Hard Disk Drive
-
 1
1 -
2
-
3
-
4
-
5
-
6
-
7
-
8
-
9
-
10
-
 11
11 -
 12
12 -
 13
13 -
 14
14 -
 15
15 -
 16
16 -
 17
17 -
 18
18 -
 19
19 -
 20
20 -
 21
21 -
22
-
23
-
24
-
25
-
26
-
27
-
28
 |
 |
14
599977-001
— Removing and Replacing a Hard Disk Drive
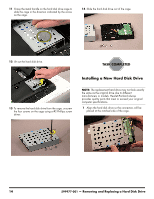
11
Grasp the metal handle on the hard disk drive cage to
slide the cage in the direction indicated by the arrow
on the cage.
12
Lift out the hard disk drive.
13
To remove the hard disk drive from the cage, unscrew
the four screws on the cage using a #2 Phillips screw
driver.
14
Slide the hard disk drive out of the cage.
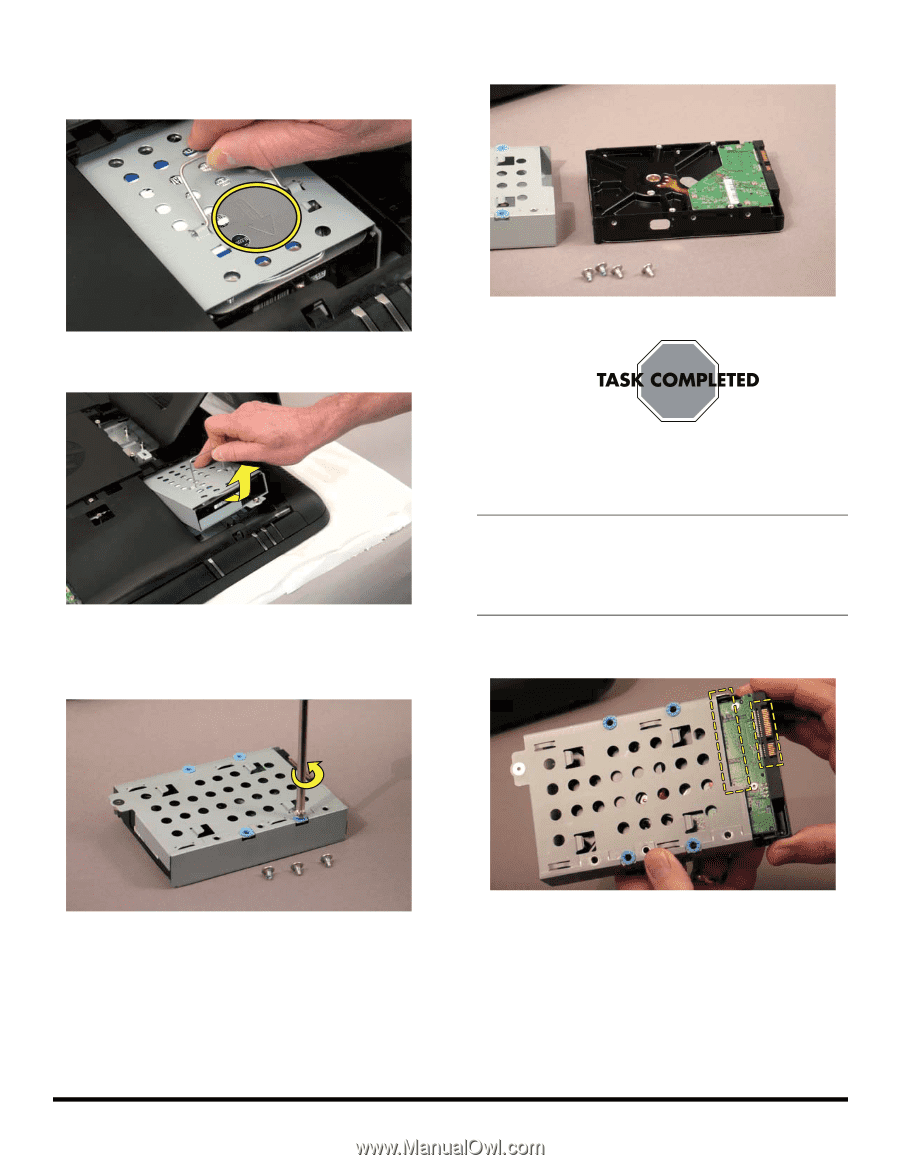
Installing a New Hard Disk Drive
1
Align the hard disk drive so the connectors will be
placed at the notched side of the cage.
NOTE:
The replacement hard drive may not look exactly
the same as the original drive due to different
manufacturers or models. Hewlett-Packard always
provides quality parts that meet or exceed your original
computer specifications.