HP BL460c HP VMware ESXi 4.0 Getting Started guide - Page 6
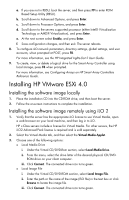
Installing HP VMware ESXi 4.0, Installing the software image locally
 |
UPC - 884420306849
View all HP BL460c manuals
Add to My Manuals
Save this manual to your list of manuals |
Page 6 highlights
a. If you are not in RBSU, boot the server, and then press F9 to enter ROM Based Setup Utility (RBSU). b. Scroll down to Advanced Options, and press Enter. c. Scroll down to Processor Options, and press Enter. d. Scroll down to the servers supported processor (either Intel® Virtualization Technology or AMD® Virtualization), and press Enter. e. At the next screen select Enable, and press Enter. f. Save configuration changes, and then exit. The server reboots. 8. To configure iLO network parameters, directory settings, global settings, and user accounts, when prompted at POST, press F8. For more information, see the HP Integrated Lights-Out 2 User Guide. 9. To create, view, or delete a logical drive for the Smart Array Controller using local storage, press F8 when prompted. For more information, see Configuring Arrays on HP Smart Array Controllers Reference Guide. Installing HP VMware ESXi 4.0 Installing the software image locally 1. Place the installation CD into the CD-ROM drive, and then boot the server. 2. Follow the on-screen instructions to complete the installation. Installing the software image remotely using iLO 2 1. Verify that the server has the appropriate iLO license to use Virtual Media, open a web browser on your local machine, and then log in to iLO. HP c-Class servers include a license for Virtual Media. For other servers, the HP iLO2 Advanced Pack license is required and is sold separately. 2. Select the Virtual Media tab, and then select the Virtual Media Applet. 3. Choose one of the following options: o Local Media Drive i. Under the Virtual CD/DVD-Rom section, select Local Media Drive. ii. From the menu, select the drive letter of the desired physical CD/DVDROM drive on your client computer. iii. Click Connect. The connected drive icon turns green. o Local Image File i. Under the Virtual CD/DVD-ROM section, select Local Image File. ii. Enter the path or file name of the image (ISO file) in the text box or click Browse to locate the image file. iii. Click Connect. The connected drive icon turns green.
-
 1
1 -
 2
2 -
 3
3 -
 4
4 -
 5
5 -
 6
6 -
 7
7 -
 8
8
 |
 |
