HP BladeSystem bc2200 HP BladeSystem PC Blade Switch Installation Guide - Page 22
Static IP Address and Subnet Mask, First Time Installation
 |
View all HP BladeSystem bc2200 manuals
Add to My Manuals
Save this manual to your list of manuals |
Page 22 highlights
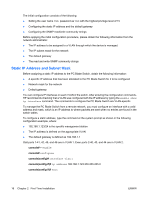
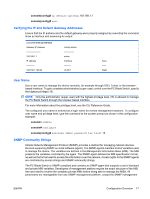
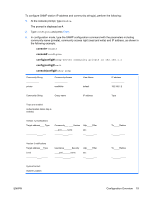
The initial configuration consists of the following: ● Setting the user name TBD, password as TBD with the highest privilege level of 15 ● Configuring the static IP address and the default gateway ● Configuring the SNMP read/write community strings Before applying the initial configuration procedure, please obtain the following information from the network administrator: ● The IP address to be assigned to a VLAN through which the device is managed. ● The IP subnet mask for the network ● The default gateway ● The read and write SNMP community strings Static IP Address and Subnet Mask Before assigning a static IP address to the PC Blade Switch, obtain the following information: ● A specific IP address that has been allocated to the PC Blade Switch for it to be configured ● Network mask for the network ● Default gateway You can configure IP interfaces on each VLAN of the switch. After entering the configuration commands, HP recommends checking that a VLAN was configured with the IP address by typing the enable show ip interface command. The commands to configure the PC Blade Switch are VLAN-specific. To manage the PC Blade Switch from a remote network, you must configure an interface with a valid address and mask, which is an IP address to where packets are sent when no entries are found in the switch tables. To configure a static address, type the command at the system prompt as shown in the following configuration example, where: ● 192.168.1.123/24 is the specific management station ● The IP address is defined on the appropriate VLAN ● The default gateway is defined as 192.168.1.1 Odd ports 1-41, 42, 45, and 46 are in VLAN 1. Even ports 2-40, 43, and 44 are in VLAN 2. console# > enable console# configure console(config)# interface vlan 1 console(config-if)# ip address 192.168.1.123 255.255.255.0 console(config-if)# exit 16 Chapter 2 First Time Installation ENWW
-
 1
1 -
2
-
3
-
4
-
5
-
6
-
7
-
8
-
9
-
10
-
11
-
12
-
13
-
14
-
15
-
16
-
 17
17 -
 18
18 -
 19
19 -
 20
20 -
 21
21 -
 22
22 -
 23
23 -
 24
24 -
 25
25 -
 26
26 -
 27
27 -
28
-
29
-
30
-
31
-
32
-
33
-
34
-
35
-
36
-
37
-
38
-
39
 |
 |
