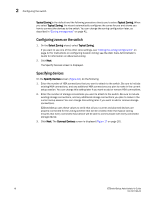
HP Brocade 8/12c Brocade EZSwitchSetup Administrator's Guide v6.2.0 (53-100119 - Page 30
Configuring zones on the switch, Specifying devices, Typical Zoning, Select Zoning, Connect Devices
 |
View all HP Brocade 8/12c manuals
Add to My Manuals
Save this manual to your list of manuals |
Page 30 highlights
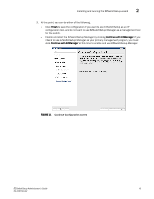
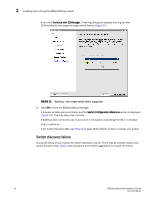
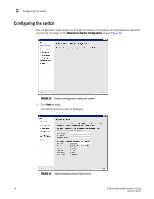
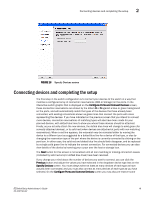
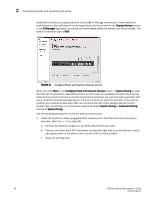
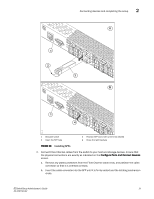
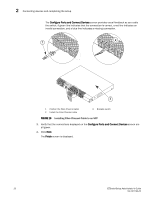
2 Configuring the switch Typical Zoning is the default and the following procedure directs you to select Typical Zoning. When you select Typical Zoning, the wizard automatically configures the zones for you and shows you how to connect the devices to the switch. You can change the zoning configuration later, as described in "Zoning management" on page 41. Configuring zones on the switch 1. On the Select Zoning wizard, select Typical Zoning. If you want to use one of the other zone settings, see "Editing the zoning configuration" on page 42 for instructions on configuring Custom zoning; see the Web Tools Administrator's Guide for information on Advanced zoning. 2. Click Next. The Specify Devices screen is displayed. Specifying devices On the Specify Devices screen (Figure 16), do the following. 1. Enter the number of HBA connections that you want to attach to the switch. Be sure to include existing HBA connections, and any additional HBA connections you plan to make in the current setup session. You can change this setting later if you want to add or remove HBA connections. 2. Enter the number of storage connections you want to attach to the switch. Be sure to include existing storage connections, and any additional storage connections you plan to make in the current setup session.You can change this setting later if you want to add or remove storage connections. EZSwitchSetup uses these values to verify that all your current and planned devices are properly connected for the zoning scheme that will be created. Note that Typical zoning ensures that every connected host device will be able to communicate with every connected storage device. 3. Click Next. The Connect Devices screen is displayed (Figure 17 on page 20). 18 EZSwitchSetup Administrator's Guide 53-1001193-02
-
 1
1 -
2
-
3
-
4
-
5
-
6
-
7
-
8
-
9
-
10
-
11
-
12
-
13
-
14
-
15
-
16
-
17
-
18
-
19
-
20
-
21
-
22
-
23
-
24
-
 25
25 -
 26
26 -
 27
27 -
 28
28 -
 29
29 -
 30
30 -
 31
31 -
 32
32 -
 33
33 -
 34
34 -
 35
35 -
36
-
37
-
38
-
39
-
40
-
41
-
42
-
43
-
44
-
45
-
46
-
47
-
48
-
49
-
50
-
51
-
52
-
53
-
54
-
55
-
56
-
57
-
58
-
59
-
60
-
61
-
62
-
63
-
64
 |
 |