HP Color LaserJet CP1510 HP Color LaserJet CP1510 Series - Software Technical - Page 160
Express Install — Express USB Install option - driver windows 10
 |
View all HP Color LaserJet CP1510 manuals
Add to My Manuals
Save this manual to your list of manuals |
Page 160 highlights
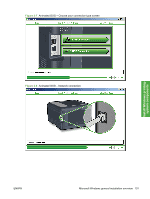
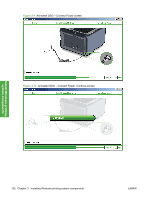
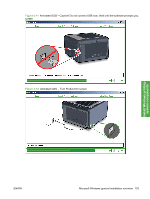
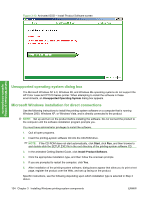
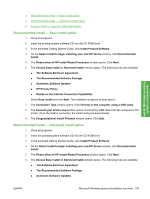
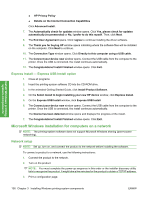
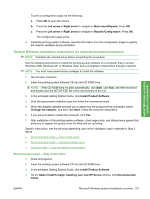
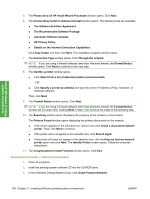
Install Windows printingsystem components ● HP Privacy Policy ● Details on the Internet Connection Capabilities Click Advanced Install. 7. The Automatically check for updates window opens. Click Yes, please check for updates automatically (recommended) or No, I prefer to do this myself. Then, click Next. 8. The End User Agreement opens. Click I agree to continue installing the driver software. 9. The Thank you for buying HP window opens indicating where the software files will be installed on the computer. Click Next to continue. 10. The Connection Type window opens. Click Directly to this computer using a USB cable. 11. The Connect your device now window opens. Connect the USB cable from the computer to the printer. Once the USB is connected, the install continues automatically. 12. The Congratulations! Install Finished window opens. Click Exit. Express Install - Express USB Install option 1. Close all programs. 2. Insert the printing-system software CD into the CD-ROM drive. 3. In the animated Getting Started Guide, click Install Product Software. 4. On the Select Install to begin installing your new HP device window, click Express Install. 5. On the Express USB Install window, click Express USB Install. 6. The Connect your device now window opens. Connect the USB cable from the computer to the printer. Once the USB is connected, the install continues automatically. The Device has been detected window opens and displays the progress of the install. 7. The Congratulations! Install Finished window opens. Click Exit. Microsoft Windows installation for computers on a network NOTE: The printing-system software does not support Microsoft Windows sharing (peer-to-peer networking). Network setup NOTE: Set up, turn on, and connect the product to the network before installing the software. To connect a product to a network, use the following instructions: 1. Connect the product to the network. 2. Turn on the product. NOTE: You must complete the power-up sequence in this order or the installer discovery utility fails to recognize the product. It might take a few minutes for the product to obtain a TCP/IP address. 3. Print a configuration page. 136 Chapter 3 Installing Windows printing-system components ENWW
-
 1
1 -
2
-
3
-
4
-
5
-
6
-
7
-
8
-
9
-
10
-
11
-
12
-
13
-
14
-
15
-
16
-
17
-
18
-
19
-
20
-
21
-
22
-
23
-
24
-
25
-
26
-
27
-
28
-
29
-
30
-
31
-
32
-
33
-
34
-
35
-
36
-
37
-
38
-
39
-
40
-
41
-
42
-
43
-
44
-
45
-
46
-
47
-
48
-
49
-
50
-
51
-
52
-
53
-
54
-
55
-
56
-
57
-
58
-
59
-
60
-
61
-
62
-
63
-
64
-
65
-
66
-
67
-
68
-
69
-
70
-
71
-
72
-
73
-
74
-
75
-
76
-
77
-
78
-
79
-
80
-
81
-
82
-
83
-
84
-
85
-
86
-
87
-
88
-
89
-
90
-
91
-
92
-
93
-
94
-
95
-
96
-
97
-
98
-
99
-
100
-
101
-
102
-
103
-
104
-
105
-
106
-
107
-
108
-
109
-
110
-
111
-
112
-
113
-
114
-
115
-
116
-
117
-
118
-
119
-
120
-
121
-
122
-
123
-
124
-
125
-
126
-
127
-
128
-
129
-
130
-
131
-
132
-
133
-
134
-
135
-
136
-
137
-
138
-
139
-
140
-
141
-
142
-
143
-
144
-
145
-
146
-
147
-
148
-
149
-
150
-
151
-
152
-
153
-
154
-
 155
155 -
 156
156 -
 157
157 -
 158
158 -
 159
159 -
 160
160 -
 161
161 -
 162
162 -
 163
163 -
 164
164 -
 165
165 -
166
-
167
-
168
-
169
-
170
-
171
-
172
-
173
-
174
-
175
-
176
-
177
-
178
-
179
-
180
-
181
-
182
-
183
-
184
-
185
-
186
-
187
-
188
-
189
-
190
-
191
-
192
-
193
-
194
-
195
-
196
-
197
-
198
-
199
-
200
-
201
-
202
-
203
-
204
-
205
-
206
-
207
-
208
-
209
-
210
-
211
-
212
-
213
-
214
-
215
-
216
-
217
-
218
-
219
-
220
-
221
-
222
-
223
-
224
-
225
-
226
-
227
-
228
-
229
-
230
-
231
-
232
-
233
-
234
-
235
-
236
-
237
-
238
-
239
-
240
-
241
-
242
-
243
-
244
-
245
-
246
-
247
-
248
-
249
-
250
-
251
-
252
-
253
-
254
-
255
-
256
-
257
-
258
-
259
-
260
-
261
-
262
-
263
-
264
-
265
-
266
-
267
-
268
-
269
-
270
-
271
-
272
-
273
-
274
-
275
-
276
-
277
-
278
-
279
-
280
-
281
-
282
-
283
-
284
-
285
-
286
-
287
-
288
-
289
-
290
-
291
-
292
-
293
-
294
-
295
-
296
-
297
-
298
-
299
-
300
-
301
-
302
-
303
-
304
-
305
-
306
-
307
-
308
-
309
-
310
-
311
-
312
-
313
-
314
-
315
-
316
-
317
-
318
-
319
-
320
-
321
-
322
-
323
-
324
-
325
-
326
-
327
-
328
-
329
-
330
-
331
-
332
-
333
-
334
-
335
-
336
-
337
-
338
-
339
-
340
 |
 |
