HP Designjet 4000 Service Manual - Page 9
Performing the Necessary Service Calibrations, Solving Print Quality Problems - series
 |
View all HP Designjet 4000 manuals
Add to My Manuals
Save this manual to your list of manuals |
Page 9 highlights
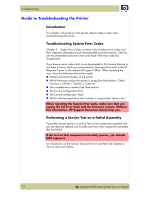
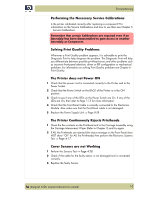
Troubleshooting Performing the Necessary Service Calibrations Is the printer calibrated correctly after replacing a component? For information on the Service Calibrations and how to use them see Chapter 5 - Service Calibrations. Remember that certain Calibrations are required even if an Assembly has been disassembled to gain access to another Assembly or Component. Solving Print Quality Problems Whenever a Print Quality problem appears, it is advisable to print the Diagnostic Print to help diagnose the problem. The Diagnostic Print will help you differentiate between possible printhead errors and other problems such as incorrect front-panel selection, driver or RIP configuration or mechanical problems. For information on solving Print Quality problems see Chapter 6 Print Quality. The Printer does not Power ON 1 Check that the power cord is connected correctly to the Printer and to the Power Socket. 2 Check that the Power Switch on the BACK of the Printer is in the ON position. 3 Check to see if any of the LEDs on the Power Switch are On. If any of the LEDs are On, then refer to Page 1-13 for more information. 4 Check that the Front-Panel Cable is correctly connected to the Electronics Module. Also make sure that the Front-Panel cable is not damaged. 5 Replace the Power Supply Unit ⇒ Page 8-78. The Printer Continuously Rejects Printheads 1 Clean the flex contacts on the Printhead and in the Carriage Assembly using the Carriage Interconnect Wiper (Refer to Chapter 3) and try again. 2 If ALL the Printheads are rejected (the status message on the Front Panel does NOT show "OK" for ALL the Printheads) then perform the Electronic Systems Test ⇒ Page 4-17. Cover Sensors are not Working 1 Perform the Sensors Test ⇒ Page 4-28. 2 Check if the cable for the faulty sensor is not damaged and is connected correctly. 3 Replace the faulty Sensor. hp designjet 4000 series printer service manual 1-3
-
 1
1 -
2
-
3
-
 4
4 -
 5
5 -
 6
6 -
 7
7 -
 8
8 -
 9
9 -
 10
10 -
 11
11 -
 12
12 -
 13
13 -
 14
14 -
15
-
16
-
17
-
18
-
19
-
20
-
21
-
22
-
23
-
24
-
25
-
26
-
27
-
28
-
29
-
30
-
31
-
32
-
33
-
34
-
35
-
36
-
37
-
38
-
39
-
40
-
41
-
42
-
43
-
44
-
45
-
46
-
47
-
48
-
49
-
50
-
51
-
52
-
53
-
54
-
55
-
56
-
57
-
58
-
59
-
60
-
61
-
62
-
63
-
64
-
65
-
66
-
67
-
68
-
69
-
70
-
71
-
72
-
73
-
74
-
75
-
76
-
77
-
78
-
79
-
80
-
81
-
82
-
83
-
84
-
85
-
86
-
87
-
88
-
89
-
90
-
91
-
92
-
93
-
94
-
95
-
96
-
97
-
98
-
99
-
100
-
101
-
102
-
103
-
104
-
105
-
106
-
107
-
108
-
109
-
110
-
111
-
112
-
113
-
114
-
115
-
116
-
117
-
118
-
119
-
120
-
121
-
122
-
123
-
124
-
125
-
126
-
127
-
128
-
129
-
130
-
131
-
132
-
133
-
134
-
135
-
136
-
137
-
138
-
139
-
140
-
141
-
142
-
143
-
144
-
145
-
146
-
147
-
148
-
149
-
150
-
151
-
152
-
153
-
154
-
155
-
156
-
157
-
158
-
159
-
160
-
161
-
162
-
163
-
164
-
165
-
166
-
167
-
168
-
169
-
170
-
171
-
172
-
173
-
174
-
175
-
176
-
177
-
178
-
179
-
180
-
181
-
182
-
183
-
184
-
185
-
186
-
187
-
188
-
189
-
190
-
191
-
192
-
193
-
194
-
195
-
196
-
197
-
198
-
199
-
200
-
201
-
202
-
203
-
204
-
205
-
206
-
207
-
208
-
209
-
210
-
211
-
212
-
213
-
214
-
215
-
216
-
217
-
218
-
219
-
220
-
221
-
222
-
223
-
224
-
225
-
226
-
227
-
228
-
229
-
230
-
231
-
232
-
233
-
234
-
235
-
236
-
237
-
238
-
239
-
240
-
241
-
242
-
243
-
244
-
245
-
246
-
247
-
248
-
249
-
250
-
251
-
252
-
253
-
254
-
255
-
256
-
257
-
258
-
259
-
260
-
261
-
262
-
263
-
264
-
265
-
266
-
267
-
268
-
269
-
270
-
271
-
272
-
273
-
274
-
275
-
276
-
277
-
278
-
279
-
280
-
281
-
282
-
283
-
284
-
285
-
286
-
287
-
288
-
289
-
290
-
291
-
292
-
293
-
294
-
295
-
296
-
297
-
298
-
299
-
300
-
301
-
302
-
303
-
304
-
305
-
306
-
307
-
308
-
309
-
310
-
311
-
312
-
313
-
314
-
315
-
316
-
317
-
318
-
319
-
320
-
321
-
322
-
323
-
324
-
325
-
326
-
327
-
328
-
329
-
330
-
331
-
332
-
333
-
334
-
335
-
336
-
337
-
338
-
339
-
340
-
341
-
342
-
343
-
344
-
345
-
346
-
347
-
348
-
349
-
350
-
351
-
352
-
353
-
354
-
355
-
356
-
357
-
358
-
359
-
360
-
361
-
362
-
363
-
364
-
365
-
366
-
367
-
368
-
369
-
370
-
371
-
372
 |
 |