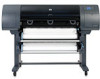
HP Designjet 4500 HP Designjet 4500 Printer Series - Setup Poster - Page 23
two screws.
 |
View all HP Designjet 4500 manuals
Add to My Manuals
Save this manual to your list of manuals |
Page 23 highlights
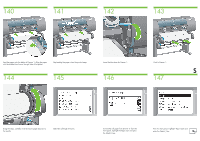
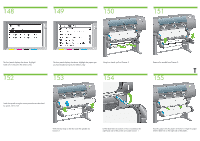
164 165 166 167 Lay one end frame on the floor. Hold one cross frame vertically with the angled part located at the top of the end frame. The cross frame must be fixed on to the inside of the shortest leg of the end frame. Fix the cross frame to the end frame using two screws. 168 169 Turn the bin assembly into a horizontal position. Attach the short leg of the second end frame to the cross frame using two screws. 170 Attach the second cross frame to the bin assembly using four screws. Please note that this cross frame is mounted on the outside of the end frames. V Attach one end of the loop on to the cross frame. Attach the other end of the loop on to the cross frame. Using the same method, attach the other 5 loops. Locate the bin against the printer. Now you have completed the assembly of your printer. The following pages describe how to configure your computer for successful printing.
-
 1
1 -
2
-
3
-
4
-
5
-
6
-
7
-
8
-
9
-
10
-
11
-
12
-
13
-
14
-
15
-
16
-
17
-
 18
18 -
 19
19 -
 20
20 -
 21
21 -
 22
22 -
 23
23 -
 24
24 -
 25
25 -
 26
26 -
 27
27
 |
 |
