HP Deskjet 916c HP DeskJet 900C Series Printer - (English) Network Guide - Page 17
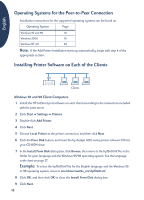
Installing Printer Software on Each Client Computer
 |
View all HP Deskjet 916c manuals
Add to My Manuals
Save this manual to your list of manuals |
Page 17 highlights
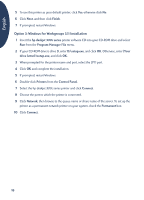
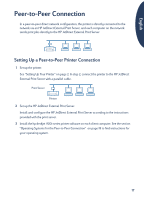
English Installing Printer Software on Each Client Computer Client Computers on Network Important Make sure you have installed printer software on the host and shared the printer before you install printer software on a client computer. When you are installing the software for a locally shared printer on a client computer, you have three options: • Point and Print Installation (see page 13): This option is quicker than the Add Printer Installation. It is supported by Windows 95, 98, 2000, and NT. • Add Printer Installation (see page 14): This option takes more time than the Point and Print installation. It is supported by Windows 95, 98, 2000, and NT. • Windows for Workgroups 3.11 Installation (see page 16): This option installs printer software using the setup.exe file. Option 1: Point and Print Installation Note: If your host computer is a Windows NT 4.0 or 2000 server, and you installed printer software for other Windows operating systems on it (see the note on pages 9 and 11), you can use Point and Print to install printer software on client computers running Windows 95, 98, 2000, or NT 4.0, directly from the host. 1 Go to the Windows desktop. 2 Double-click the Network Neighborhood icon. 3 Double-click the icon for the computer on which the printer is installed. 4 Right-click the printer icon and choose Install. The Add Printer Wizard dialog box appears. 5 If you want to print from MS-DOS based programs, click Yes. 6 Click Next. 7 Accept the default printer name (recommended) or type a new name. 8 To use this printer as your default printer, click Yes; otherwise click No. 9 Click Next. 13
-
 1
1 -
2
-
3
-
4
-
5
-
6
-
7
-
8
-
9
-
10
-
11
-
 12
12 -
 13
13 -
 14
14 -
 15
15 -
 16
16 -
 17
17 -
 18
18 -
 19
19 -
 20
20 -
 21
21 -
 22
22 -
23
-
24
-
25
-
26
-
27
-
28
-
29
-
30
-
31
-
32
 |
 |
