HP ENVY TouchSmart m7-j120dx HP ENVY 17 Notebook PC HP ENVY TouchSmart m7 Note - Page 60
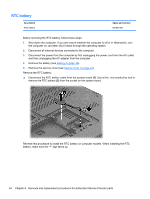
Display panel, Use a sharp probe to pop the covers out to avoid scratching the bezel.
 |
View all HP ENVY TouchSmart m7-j120dx manuals
Add to My Manuals
Save this manual to your list of manuals |
Page 60 highlights
Display panel NOTE: The TouchScreen display assembly is spared as a whole unit assembly only. The nonTouchScreen display is spared at the subcomponent level only. Before removing the display panel, follow these steps: 1. Shut down the computer. If you are unsure whether the computer is off or in Hibernation, turn the computer on, and then shut it down through the operating system. 2. Disconnect all external devices connected to the computer. 3. Disconnect the power from the computer by first unplugging the power cord from the AC outlet and then unplugging the AC adapter from the computer. 4. Remove the battery (see Battery on page 39). Remove the display panel: 1. Open the computer. 2. Remove the 2 screw covers (1) on the left and right side base of the display panel. NOTE: Use a sharp probe to pop the covers out to avoid scratching the bezel. 3. Remove the 2 screws (2) on the left and right hinges that secure the display panel to the computer. NOTE: Support the display panel as you are removing the screws. 4. Loosen the edges of the plastic bezel cover (3) from all four sides of the display panel. 50 Chapter 6 Removal and replacement procedures for Authorized Service Provider parts
-
 1
1 -
2
-
3
-
4
-
5
-
6
-
7
-
8
-
9
-
10
-
11
-
12
-
13
-
14
-
15
-
16
-
17
-
18
-
19
-
20
-
21
-
22
-
23
-
24
-
25
-
26
-
27
-
28
-
29
-
30
-
31
-
32
-
33
-
34
-
35
-
36
-
37
-
38
-
39
-
40
-
41
-
42
-
43
-
44
-
45
-
46
-
47
-
48
-
49
-
50
-
51
-
52
-
53
-
54
-
 55
55 -
 56
56 -
 57
57 -
 58
58 -
 59
59 -
 60
60 -
 61
61 -
 62
62 -
 63
63 -
 64
64 -
 65
65 -
66
-
67
-
68
-
69
-
70
-
71
-
72
-
73
-
74
-
75
-
76
-
77
-
78
-
79
-
80
-
81
-
82
-
83
-
84
-
85
-
86
-
87
-
88
-
89
-
90
-
91
-
92
-
93
-
94
-
95
-
96
-
97
-
98
-
99
-
100
-
101
-
102
-
103
-
104
-
105
-
106
-
107
-
108
-
109
-
110
-
111
-
112
-
113
-
114
-
115
-
116
 |
 |
