HP ENVY x2 - 15-c011dx HP ENVY x2 Detachable PC Maintenance and Service Guide - Page 41
and then lock the two suction cup handles together, engage the suction cup
 |
View all HP ENVY x2 - 15-c011dx manuals
Add to My Manuals
Save this manual to your list of manuals |
Page 41 highlights
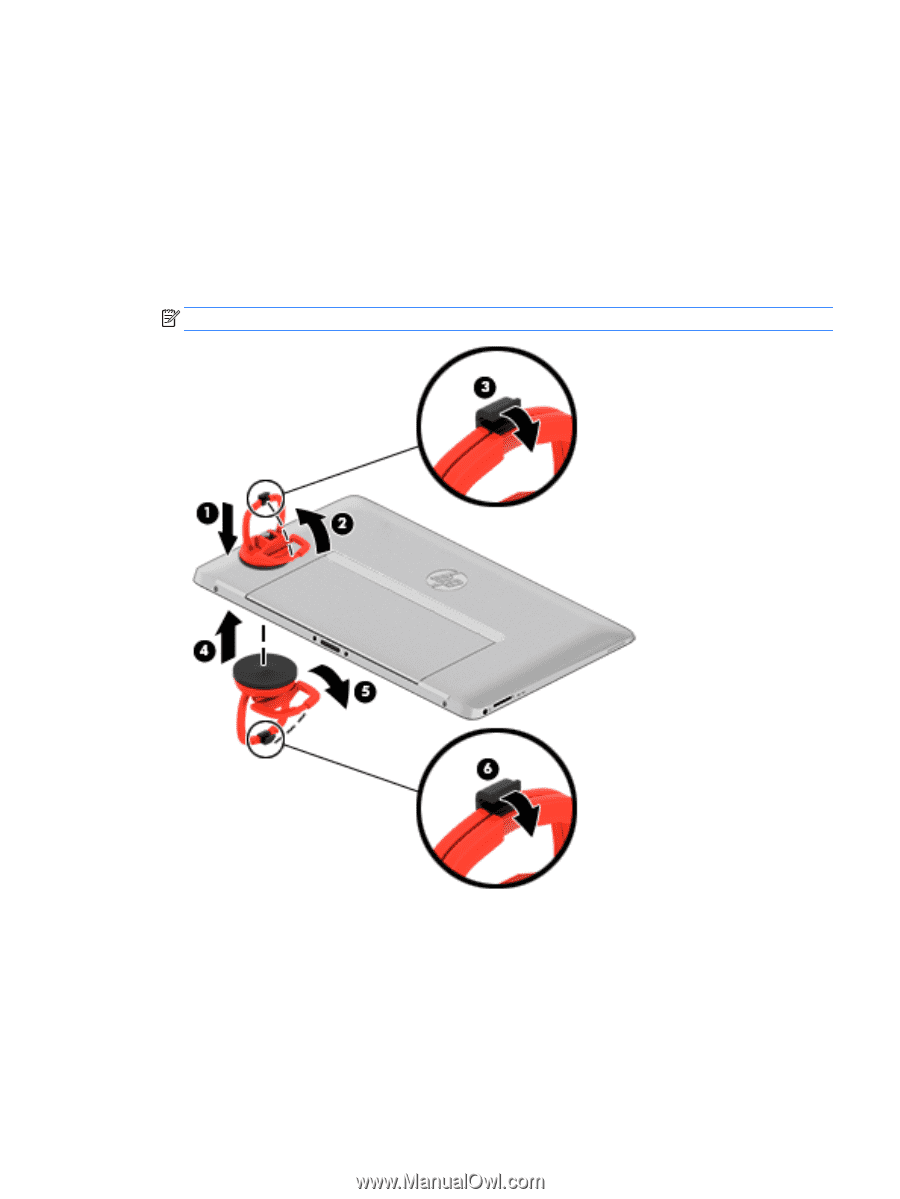
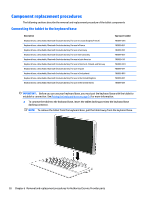
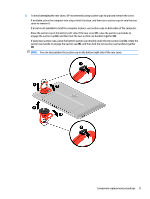
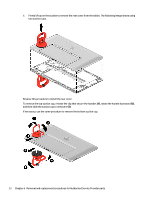
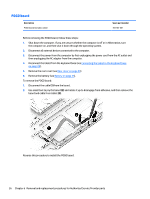
5. To avoid damaging the rear cover, HP recommends using suction cups to grip and remove the cover. If available, place the computer into a jig to hold it in place, and then use a suction cup on only the rear cover to remove it. If a tool is not available to hold the computer in place, use suction cups on both sides of the computer. Place the suction cup in the bottom, left side of the rear cover (1), raise the suction cup handle to engage the suction cup (2), and then lock the two suction cup handles together (3). If using two suction cups, place the bottom suction cup directly under the top suction cup (4), rotate the suction cup handle to engage the suction cup (5), and then lock the two suction cup handles together (6) NOTE: You can also position the suction cup on the bottom right side of the rear cover. Component replacement procedures 31
-
 1
1 -
2
-
3
-
4
-
5
-
6
-
7
-
8
-
9
-
10
-
11
-
12
-
13
-
14
-
15
-
16
-
17
-
18
-
19
-
20
-
21
-
22
-
23
-
24
-
25
-
26
-
27
-
28
-
29
-
30
-
31
-
32
-
33
-
34
-
35
-
 36
36 -
 37
37 -
 38
38 -
 39
39 -
 40
40 -
 41
41 -
 42
42 -
 43
43 -
 44
44 -
 45
45 -
 46
46 -
47
-
48
-
49
-
50
-
51
-
52
-
53
-
54
-
55
-
56
-
57
-
58
-
59
-
60
-
61
-
62
-
63
-
64
-
65
-
66
-
67
-
68
-
69
-
70
-
71
-
72
-
73
-
74
-
75
-
76
-
77
-
78
-
79
-
80
-
81
-
82
 |
 |